How to install OpenClaw 2026 (easy set up guide)
Our in-house experts conduct independent, hands-on testing and transparent reviews of VPS hosting providers by using real server environments, and industry-recognized benchmarking methods to ensure impartial and evidence-based assessments
Using the same criteria for all VPS services, we share our detailed methodologies and testing practices to help customers compare performance, reliability, scalability, and overall value before choosing a virtual private server.
Learn more
OpenClaw is a free, open-source AI agent platform you can host yourself. It can automate tasks, manage files, and crawl the web, all while connecting with everyday apps like email, calendars, and cloud storage. What makes OpenClaw especially cool is the way you can control it through messaging apps such as WhatsApp, Telegram, or iMessage, so managing your digital life feels as easy as chatting with a friend.
In this article, I walk you through installing OpenClaw in 2026. Whether you are a complete beginner or looking for a faster setup, you will find clear, step-by-step instructions to get started with OpenClaw right away.
One-click OpenClaw installation
The easiest way to install OpenClaw in 2026 is using a pre-configured VPS - and Hostinger currently offers the simplest one-click OpenClaw setup.

Here’s the simple one-click OpenClaw installation guide for Hostinger OpenClaw VPS:
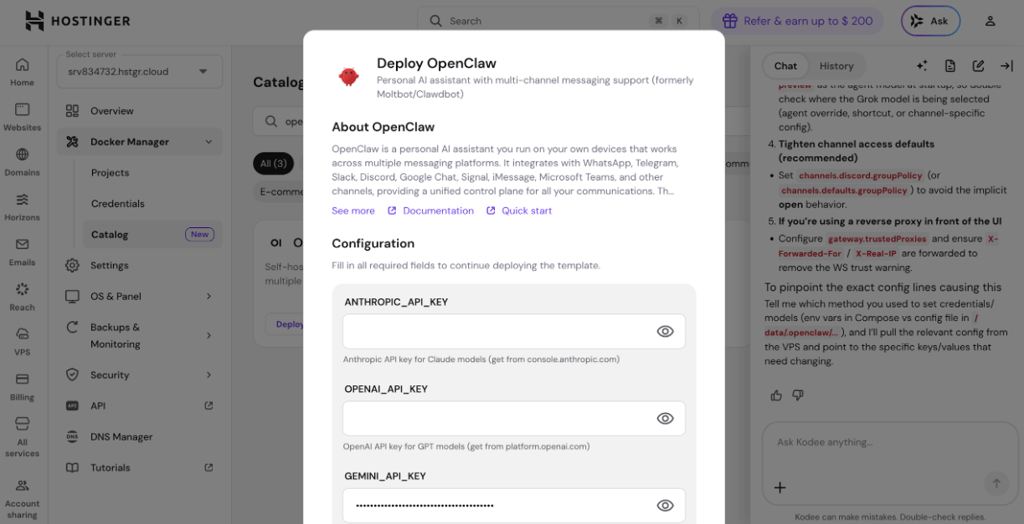
- Acquire the API key from the AI model you want to use. You will need this later.
- Choose and purchase a Hostinger OpenClaw VPS plan. I recommend KVM 2, since it has at least 2GB RAM and 1-2 vCPUs – the minimum requirements to successfully run OpenClaw.
-
Copy and save the OpenClaw gateway token. Add your WhatsApp number. Paste your API key into the required field. Click deploy.

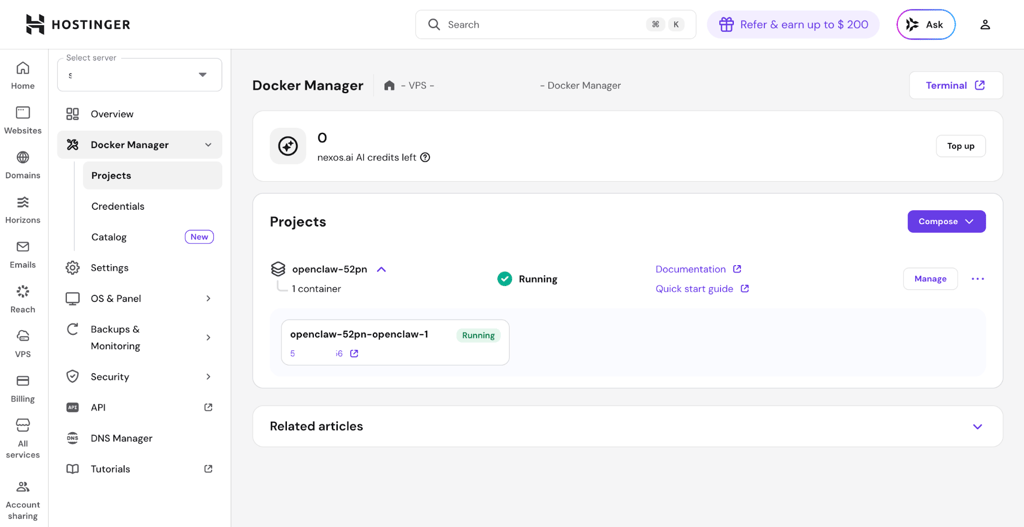
- Hostinger will automatically deploy OpenClaw in Docker. You will be redirected to the Docker Manager. From there, you can access your OpenClaw project.
-
To finish the setup, click the link under your OpenClaw project in the Docker manager, and paste the gateway token you copied and saved earlier.

How to install OpenClaw – step by step
Installing OpenClaw can be a finicky process for users with no experience. Luckily, the official OpenClaw installer can speed up and simplify the process significantly. However, you will still need knowledge of how to work with the command line interface (CLI) and Node 22+.
It’s good to keep in mind that OpenClaw’s target audience is developers and power users. It can be a difficult tool to use for beginners, mostly because of security and expertise knowledge requirements. OpenClaw might have security gaps that can be difficult to patch or control for non-technical users. Therefore, I always recommend following the best security practices as per the official OpenClaw documentation.
The following guide is for MacOS/Linux. You can also install OpenClaw with Docker, which is recommended for better security.
The following guide is for illustration purposes only. Cybernews is not responsible for the users’ security setup. Users are responsible for their own data security: they should always keep API keys, passwords, and gateway tokens a secret, not expose them to the public, and ensure they can’t be leaked.
Step 1. System prerequisites
Ensure that you have everything that is required for running OpenClaw on your local device or server:
- Linux, MacOS, or Windows (WSL2)
- At least 2GB RAM and >500MB disk space
- Node.js 22 or newer
Step 2. Install OpenClaw
In CLI, enter the following command to install OpenClaw:
curl -fsSL https://openclaw.ai/install.sh | bash
Step 3. Onboard
The OpenClaw onboarding wizard is the easiest and best recommended way to set up OpenClaw. It will configure a gateway connection, channels, skills, and workspace.
After installation is complete, run the following command:
openclaw onboard --install-daemon
Step 4. Check the gateway
If OpenClaw was installed successfully, it should be running. To check for this, type the following:
openclaw gateway status
Step 5. Open the OpenClaw dashboard
To access the OpenClaw UI, type the following:
openclaw dashboard
The OpenClaw dashboard is there to finish setting everything up – connecting to a messaging app like WhatsApp or Telegram, setting up security, and others. It makes using OpenClaw simpler than operating from the CLI.
Video guide
If you would like to see how to install OpenClaw on a VPS using Hostinger, check out our video below.
Final thoughts
Using the one-click OpenClaw installer from Hostinger is the easiest way to get started with OpenClaw – you don’t need to know a single line of code, and the entire setup takes just a few minutes. On the other hand, you can also easily set up OpenClaw manually via the command line and using the official OpenClaw installer and onboarding wizard. The onboarding wizard helps you configure essential connections and features without guesswork. With OpenClaw up and running, you can automate tasks, manage files, and integrate with your favorite messaging apps, all from a platform you control.