How I built my own VPN (and what I learned)

Digital privacy scandals seem to break almost weekly, and with each news alert, my frustration grows. I hate the idea of paying subscription fees to companies whose no‑logs promises sometimes turn out to be empty.
I wanted to reclaim some control over my data and learn what actually goes on behind a VPN tunnel. That curiosity led me down the rabbit hole of self‑hosting – a movement of tinkerers who run their own services instead of relying on big tech.
Tempting as it was to spin up servers at home, security experts warn that misconfigured devices can be recruited into botnets. So I chose a safer compromise: building a private VPN on a remote VPS rather than exposing my home network.
Why even build your own VPN?
A virtual private network encrypts your internet traffic and hides your IP address. Commercial providers promise privacy, but you’re essentially trusting them not to log your activities. In 2020, some cases exposed that several no‑logs VPNs were caught storing data.


That’s one reason why the trend of de-Googling and taking back digital control is growing – and even search interest for terms like how to make VPN is climbing fast on Google Trends. Self-hosting on a VPS flips the trust equation: you control the hardware, software, and logs.

A VPS allocates dedicated CPU, RAM, bandwidth, and a static IP just for you – no neighbours hogging resources. That static IP means fewer CAPTCHAs and less risk of being blocked by banks or streaming services. Plus, you can choose your protocol.
I went with WireGuard because its lean codebase and simplified cryptography make it faster and easier to audit than legacy protocols.
Choosing a server and getting WireGuard running
To create a VPN, my first task was selecting a server. I picked a modest KVM VPS from Hostinger – one CPU core, 4 GB of RAM, 50 GB of storage – running Ubuntu 24.04 LTS.
I logged in with my VPS credentials on the Termius software and, feeling a bit like a hacker in a movie, ran sudo apt update && apt upgrade to patch the system.
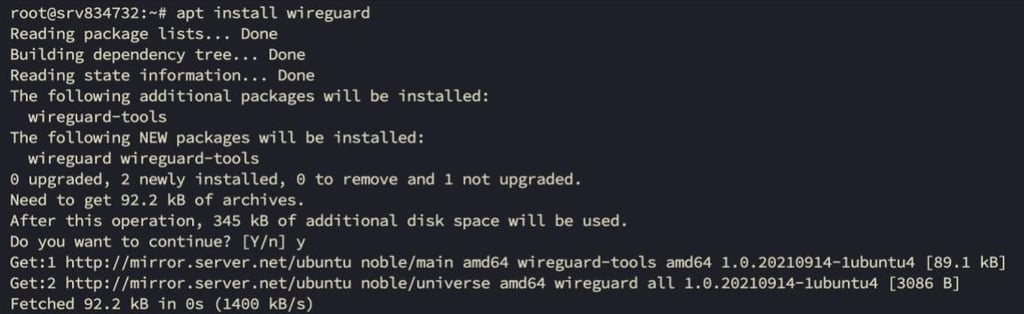
Then I installed WireGuard and resolvconf, which would later ensure DNS queries go through the encrypted tunnel. Watching the packages download and install felt like crossing a point of no return.
Generating the keys
WireGuard uses public‑key cryptography. Each peer has a private key (secret) and a public key (shared).

The umask 077 command makes sure the keys are readable only by me; mismanaging them could expose the VPN. On my Mac laptop, I installed wireguard-tools via Homebrew and generated the client keys the same way.

In the end I had four files: privatekey_server, publickey_server, privatekey_client, publickey_client.
Building the server configuration
Now came the nerve‑wracking part: creating the WireGuard configuration file. This is necessary in order to define your server’s configuration settings, such as the listening port, IP addresses, and adding the keys.
This is done by creating a configuration file named wg0.conf and adding the configuration template. Do note that this is done on the server side.
I opened /etc/wireguard/wg0.conf and populated it like this:
[Interface]
PrivateKey =
Address = 10.0.0.1/24ListenPort = 51820
PostUp = iptables -A FORWARD -i wg0 -j ACCEPT; iptables -t nat -A
POSTROUTING -o eth0 -j MASQUERADE; ip6tables -A FORWARD -i wg0 -j
ACCEPT; ip6tables -t nat -A POSTROUTING -o eth0 -j MASQUERADE
PostDown = iptables -D FORWARD -i wg0 -j ACCEPT; iptables -t nat -D
POSTROUTING -o eth0 -j MASQUERADE; ip6tables -D FOWARD -i wg0 -j
ACCEPT; ip6tables -t nat -D POSTROUTING -o eth0 -j MASQUERADE
[Peer]
PublicKey =
AllowedIPs = 10.0.0.2/32
[Interface] section. This section describes the VPN server itself.
PrivateKey holds the server’s private key. I copied the contents of privatekey_server here. This key stays secret on the server.
Address assigns an internal IP address to the VPN interface. 10.0.0.1/24 means the server will use 10.0.0.1 and reserve the rest of the 10.0.0.* range for clients.
ListenPort defines which UDP port WireGuard will listen on (51820 by default).
PostUp and PostDown are sets of commands that run automatically when the VPN interface starts or stops. They set up and tear down network rules:
- iptables -A FORWARD -i wg0 -j ACCEPT allows traffic coming from the VPN tunnel (wg0) to be forwarded out to other networks. Without this, the server would drop packets from VPN clients.
- iptables -t nat -A POSTROUTING -o eth0 -j MASQUERADE turns on network‑address translation (NAT) for outgoing traffic. MASQUERADE rewrites the source address of packets from your private VPN network so they appear to come from the server’s public IP. This “hides” all of your clients behind one address and allows them to browse the internet normally.
The ip6tables commands are the same rules for IPv6 traffic.
The corresponding PostDown commands remove these rules when the interface shuts down, cleaning up your firewall.

[Peer] section. Each peer (client) you want to connect to has its own stanza:
- PublicKey is the client’s public key (from publickey_client)
- AllowedIPs defines which IP address(es) on the VPN are assigned to that client. 10.0.0.2/32 means the client will use only the single IP 10.0.0.2
Once I filled in the keys and saved the file, I told the server which address and port to use, how to handle traffic, and which clients to trust.
Setting up IP forwarding and the firewall
A VPN server needs to forward packets from the private tunnel out to the wider internet. By default, Linux kernels don’t forward traffic between interfaces, so I must enable it:

1. Enable IP forwarding. I edited /etc/sysctl.conf and removed the # in front of net.ipv4.ip_forward=1 and net.ipv6.ip_forward=1. This tells the kernel to pass IPv4 and IPv6 traffic from one interface to another. I applied the change by running sysctl -p
2. Configure the firewall. I used UFW to open only the necessary ports. Run:
- ufw allow 51820/udp to allow incoming WireGuard connections
- ufw allow ssh so you can still manage your server
- ufw enable to activate the firewall
These rules ensure that only the VPN port and SSH are open to the world.
3. Start and enable WireGuard. Launch the VPN with wg-quick up wg0, which reads your wg0.conf and brings up the wg0 interface. To make the VPN start automatically on boot, run systemctl enable wg-quick@wg0

Together, these steps tell your server how to talk to clients securely (via the configuration file), make sure it knows to forward packets from the tunnel to the internet (via IP forwarding), and safely expose only the necessary services (via the firewall).
Connecting to your new VPN
With the server humming along, it’s time to get your laptop or phone to use the tunnel. First, install the WireGuard app from the official site (wireguard.com/install). The app expects a little configuration file that tells it who you are and which server to talk to – think of it as your boarding pass for the encrypted tunnel.

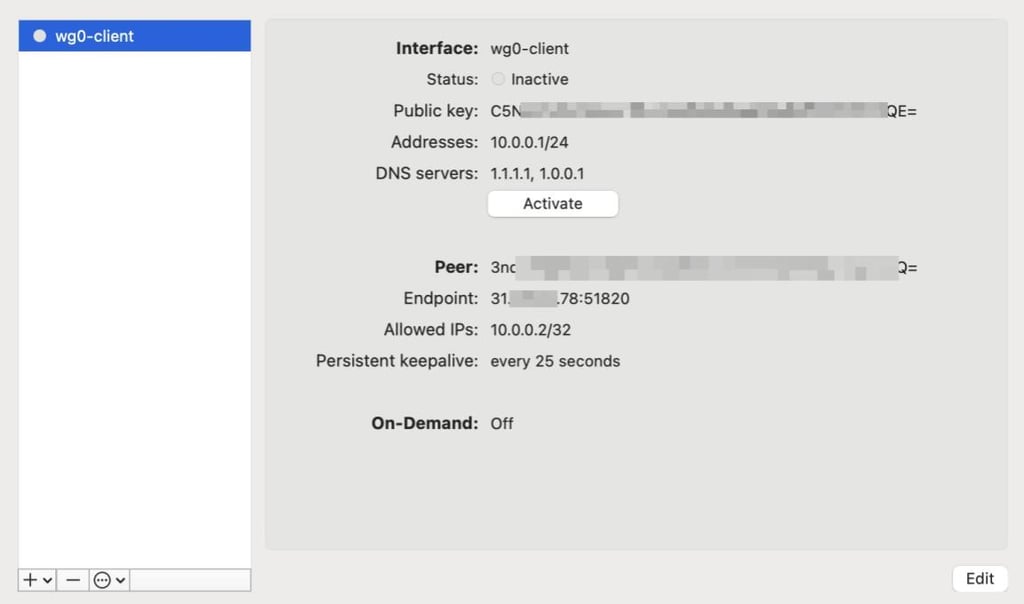
On my client machine, I created a file called wg0-client.conf (I used vim wg0-client.conf, but any text editor works) and pasted in a template like this:
[Interface]
PrivateKey =
Address = 10.0.0.2/24
DNS = 1.1.1.1, 1.0.0.1
[Peer]
PublicKey =
Endpoint = :51820
AllowedIPs = 0.0.0.0/0
PersistentKeepalive = 25
In the [Interface] section, I replaced with the private key I generated on my device and gave myself an address on the VPN network (10.0.0.2/24 is typical). The [Peer] section points to the server: paste its public key and IP address where indicated. The AllowedIPs set to 0.0.0.0/0 tells my client to send all its traffic through the VPN.
Then, I saved the file, opened the WireGuard app, and imported the configuration (most apps let you browse to the file or paste its contents). Tapped Activate, and the switch flipped green.
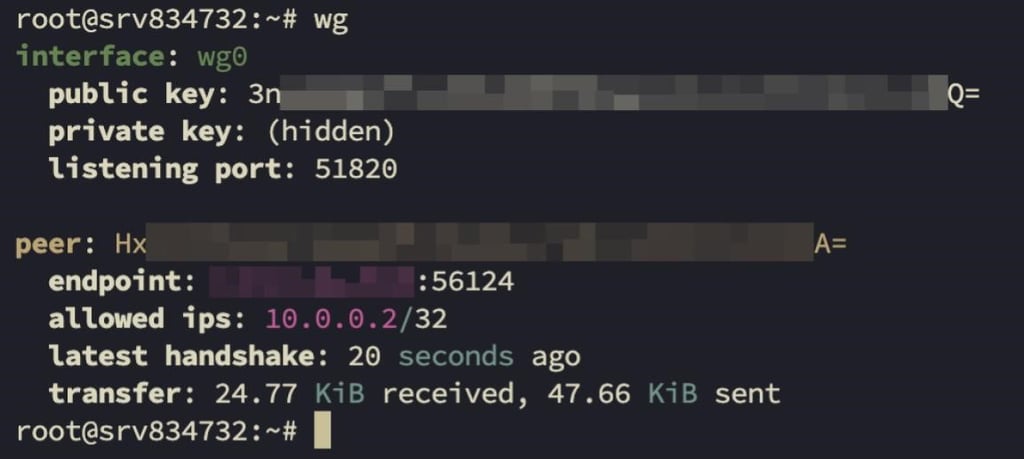
Back on my VPS, I ran wg to watch my client and server exchanging keys and talking securely. For peace of mind, you can visit an IP leak checker and a DNS leak test site to confirm the outside world only sees your VPS’s address. If everything checks out, congratulations – you’ve just connected to your very own VPN.
Here’s my IP and DNS leak checks that the connection was good, with no leaks:
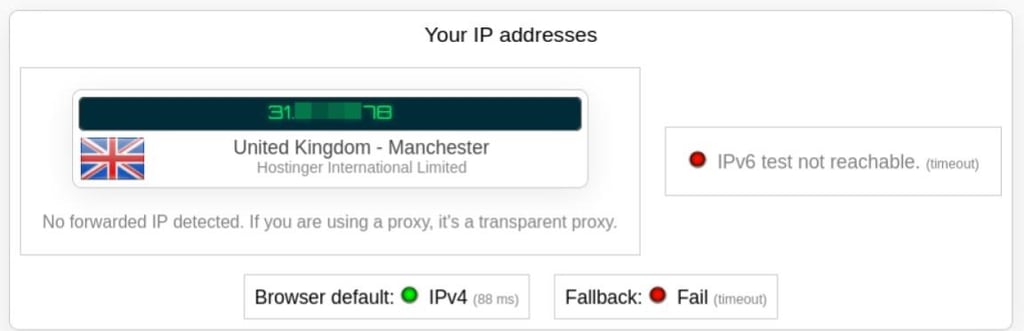
IP leak shows that I'm routing my traffic through the VPS IP

DNS leak test shows the same VPS IP with several Cloudflare DNS servers
What I gained – and what I didn’t
Running my own VPN gave me a sense of autonomy. No third‑party company could claim to be no‑logs while secretly recording my data. All logs were under my control. Performance was snappy because the VPS’s bandwidth wasn’t shared. Having a static IP meant my bank didn’t lock me out and streaming services stopped bombarding me with CAPTCHAs. And, let’s be honest, there’s a certain satisfaction in rolling your own infrastructure – like making sourdough bread or building a PC.
But the process wasn’t all easy. I spent hours in the terminal reading man pages and cross‑checking tutorials. There is no customer support when you misconfigure something – only scattered forum posts and the occasional helpful blog.
Setting up and maintaining the server requires basic Linux command‑line knowledge. I also had to trust the VPS provider not to log my activities. While I controlled the VPN, the VPS provider still knows my original IP and data usage.
And if the server goes down, there’s no failover like commercial services; my connection simply drops.
Lessons learned and final thoughts
Building my own VPN taught me a lot about networking, encryption and system administration. It demystified what was once a black box. Would I recommend it? If you enjoy tinkering, want absolute control, and understand the risks, absolutely. But remember the cardinal rule of self‑hosting: never expose services to the internet unless you know exactly what you’re doing.
Keep ports closed, update your system, and monitor logs. If you just want quick privacy and don’t care about static IPs or learning how VPNs work, a reputable commercial service might serve you better. Self‑hosting isn’t a silver bullet – it’s a choice between freedom and responsibility.