How to set up OpenClaw on Mac 2026 (beginner-friendly guide)
Our in-house experts conduct independent, hands-on testing and transparent reviews of VPS hosting providers by using real server environments, and industry-recognized benchmarking methods to ensure impartial and evidence-based assessments
Using the same criteria for all VPS services, we share our detailed methodologies and testing practices to help customers compare performance, reliability, scalability, and overall value before choosing a virtual private server.
Learn more
If you want to run your own AI tools without relying on third-party platforms, OpenClaw is one of the easiest ways to get started. It lets you deploy and manage AI agents that can automate tasks like research, coding, and everyday workflows. This can save a lot of time if you regularly deal with repetitive tasks or want more control over how your AI tools run.
In this guide, I’ll show you how to set up OpenClaw step by step. I’ll also recommend a web host that lets you skip most of the technical setup and deploy OpenClaw much faster.
Running OpenClaw on your Mac vs on a remote server
Running OpenClaw locally (e.g., on Mac) works for testing, but it’s not reliable for real use. If you want your AI agents to run continuously, you’ll need a remote server — and Hostinger is one of the easiest ways to set this up.. Hostinger lets you install OpenClaw with one click and keeps your AI agents running 24/7.

If you still want to set up OpenClaw on your Mac, the next section walks you through the local installation process.
How to set up OpenClaw on Mac step-by-step
Setting up OpenClaw on macOS is fairly straightforward. You only need to install Homebrew, run the OpenClaw installer, and complete a short onboarding wizard that configures your environment. Below, I’ll walk you through each step.
Step 1. Install Homebrew
OpenClaw requires Homebrew, a package manager used to install developer tools on macOS. Here’s what you need to do:
- Open the Terminal app on your Mac.
- Paste the following command and press Enter:
/bin/bash -c "$(curl -fsSL https://raw.githubusercontent.com/Homebrew/install/HEAD/install.sh)"
Wait for the installation to finish before moving to the next step.
Step 2. Install OpenClaw
Once Homebrew is installed, you can install OpenClaw using the official installer. In Terminal, run the following command:
curl -fsSL https://openclaw.ai/install.sh | bash
This script downloads the OpenClaw CLI, installs it globally through npm, and automatically launches the OpenClaw onboarding wizard.

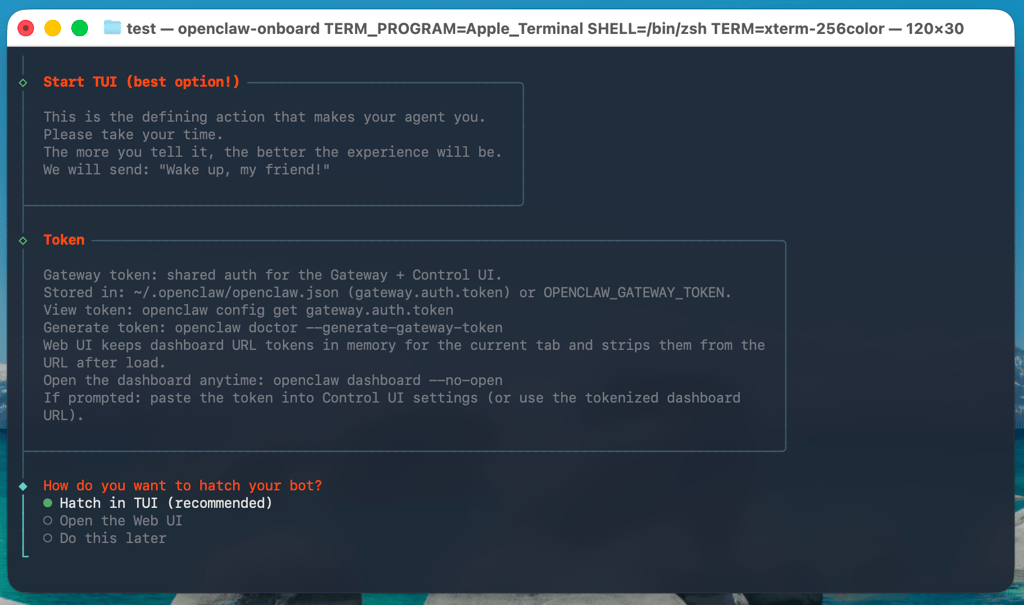
Step 3. Complete the OpenClaw setup wizard
The onboarding wizard will guide you through the main configuration steps:
- Connect an LLM provider by adding an API key
- Choose communication channels like WhatsApp, Telegram, or Discord
- Set up basic workspace settings
The wizard will also generate a Gateway Token. Make sure to save it, as you’ll need it to connect to the OpenClaw interface.
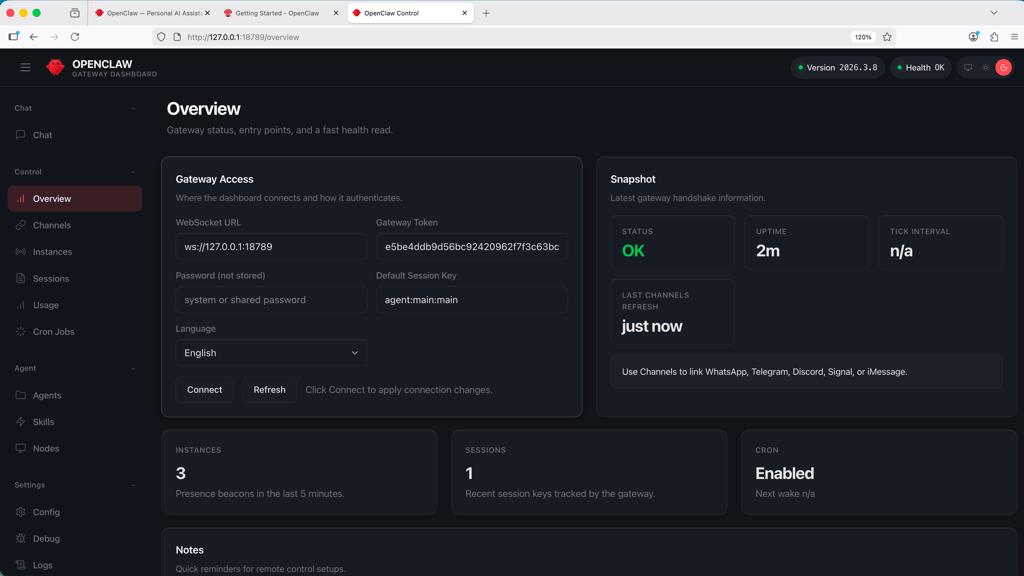
Step 4. Connect to the OpenClaw interface
After completing the wizard, OpenClaw runs locally on your Mac:
- Open your browser and go to http://127.0.0.1:18789/
- Navigate to Overview and then go to Gateway Access
- Paste your Gateway Token and click Connect
Once connected, the OpenClaw interface will load, and your setup will be ready to use.
Final thoughts
Setting up OpenClaw on a Mac is a reliable way to test the platform and explore AI automations. Once you install Homebrew, run the installer, and complete the setup wizard, you can start experimenting with workflows and AI agents locally.
For tasks that need to run 24/7, such as Discord bots, email automation, or public tools, a local Mac setup isn’t ideal. In that case, using a remote server like Hostinger is the better choice. Hostinger lets you deploy OpenClaw with one click and keeps your AI agents running continuously without any technical hassle.