Adobe Photoshop inside ChatGPT integration review: hands-on evaluation
Being behind major reports like The Mother of All Breaches and RockYou2024, our in-house cybersecurity experts and journalists provide unbiased, real-world testing and in-depth analysis.
We maintain complete transparency by openly sharing our testing methodologies with our audience.
Learn more
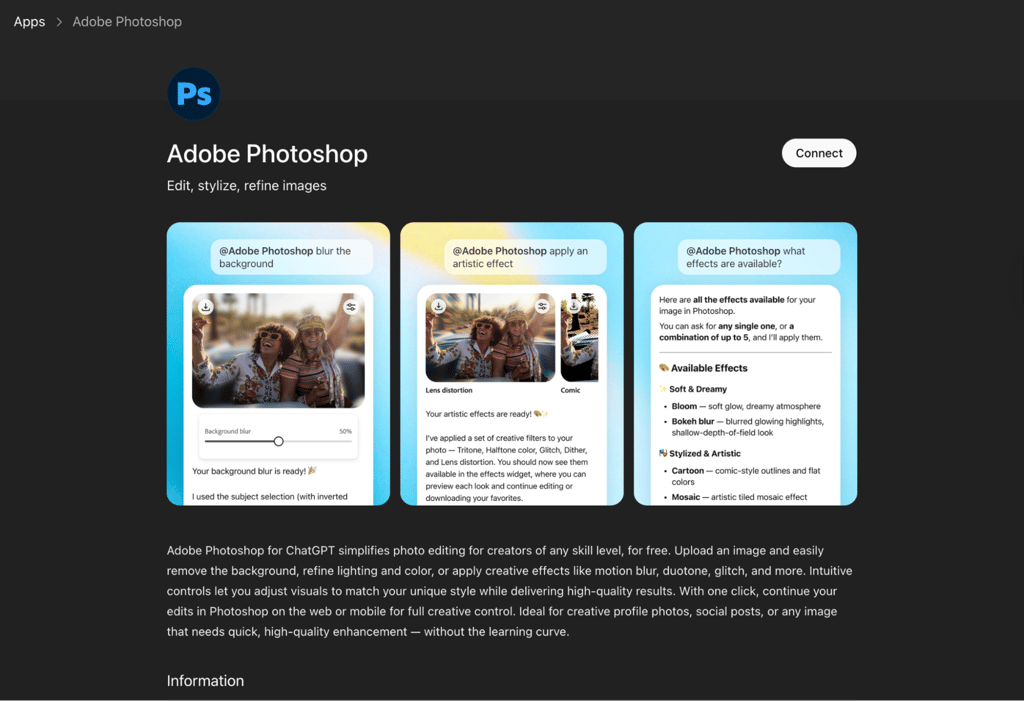
There’s now an Adobe Photoshop inside ChatGPT integration that gives you access to Adobe Photoshop edits directly within your ChatGPT chatbox. It’s part of Adobe’s update that connects Adobe Photoshop, Express, and Acrobat to ChatGPT. It isn’t text-to-image generation – it’s filters, adjustments, and retouching using Photoshop within ChatGPT, so even non-tech-savvy people can benefit without needing to use the standalone version of Photoshop.
As a tech expert working with the Cybernews research team, I tested and researched this integration to provide my honest opinion on its functionality and value. I relied on Adobe’s official specifications and documentation to give you an honest and transparent review.
What is the Photoshop integration inside ChatGPT?
The Photoshop ChatGPT integration is native – meaning Photoshop features can be invoked via the ChatGPT prompt box when you tell it to do so. You’re essentially talking to Photoshop through ChatGPT – and Adobe says it’s “a match made in creativity heaven.”
The common misconception about this is that the integration is a pure image generator – it’s not. In practice, it’s more like guided editing – where you upload an existing image, after which you can have a certain object stand out, add an artistic effect, or apply a grain finish. Following this, you can export the finished image to Photoshop on the web for more editing.
Here’s how the integration compares to Photoshop’s desktop/web version:
- Accessibility and simplicity. To put it simply, prompts replace editing panels. You can also fine-tune sliders for effects, filters, and masks after each iteration.
- Toolset breadth. You get common Photoshop effects and enhancements. Of course, it doesn’t include every preset or plugin that the full version of Photoshop has.
- Output control. I got most of my finished results in under 30 seconds. However, the full Photoshop is better suited for fine changes and project tracking.
- File management and export differences. In ChatGPT, the Photoshop workflow is meant to be lightweight and quick, but you can still export your work to Photoshop on the web. In the full version, you have access to professional formats, assets, and versioning.
Pros and cons
It’s helpful to consider the pros and cons of the Photoshop integration inside ChatGPT for a quick overview. Let’s take a look at them.
How to access and start using Photoshop inside ChatGPT
To get the integration working, I connected the Adobe integration once within ChatGPT, and it stays connected. After that, I could trigger the Photoshop integration in the chat window. Here’s a step-by-step guide on how to enable it yourself:
-
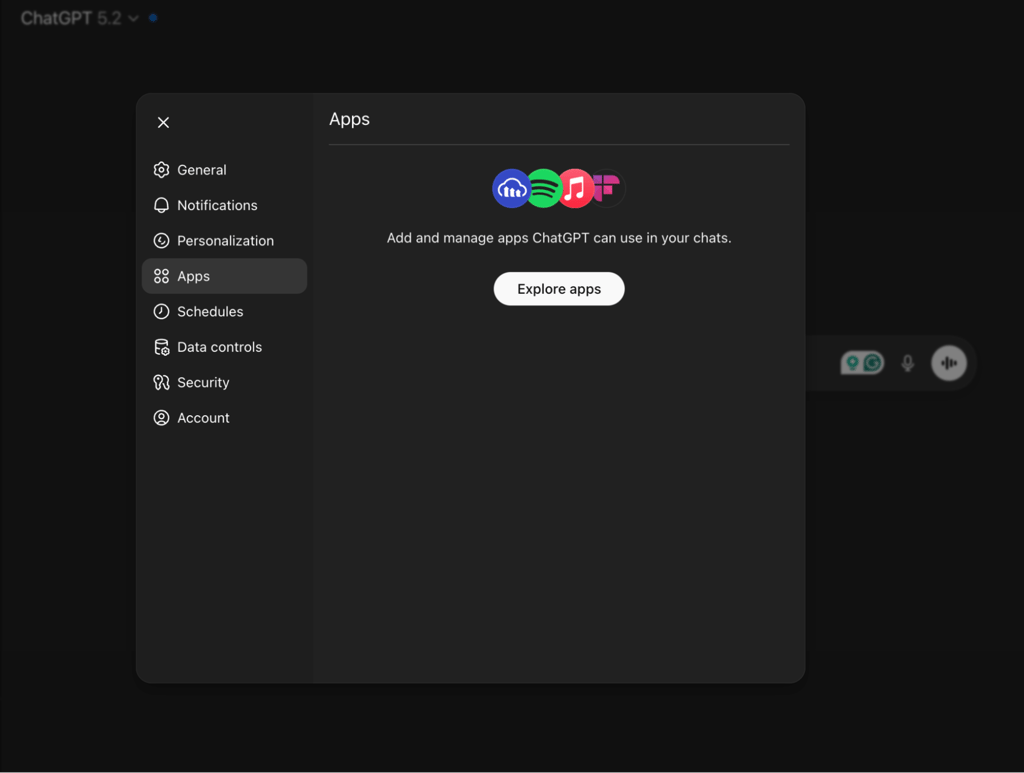
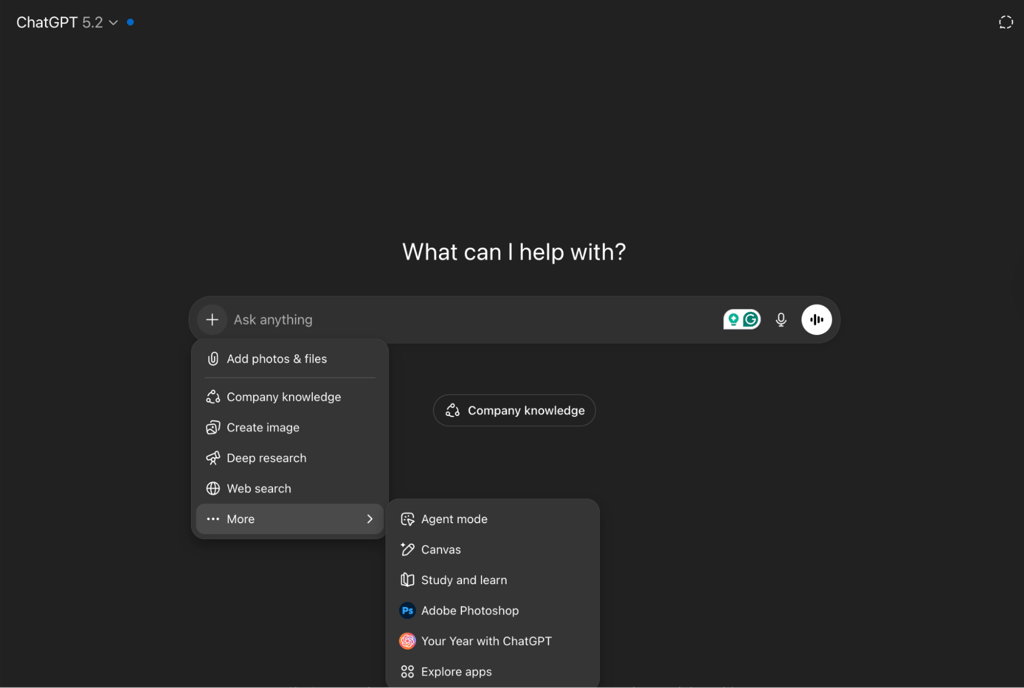
In ChatGPT, open Settings, go to Apps, and click on Explore apps
-
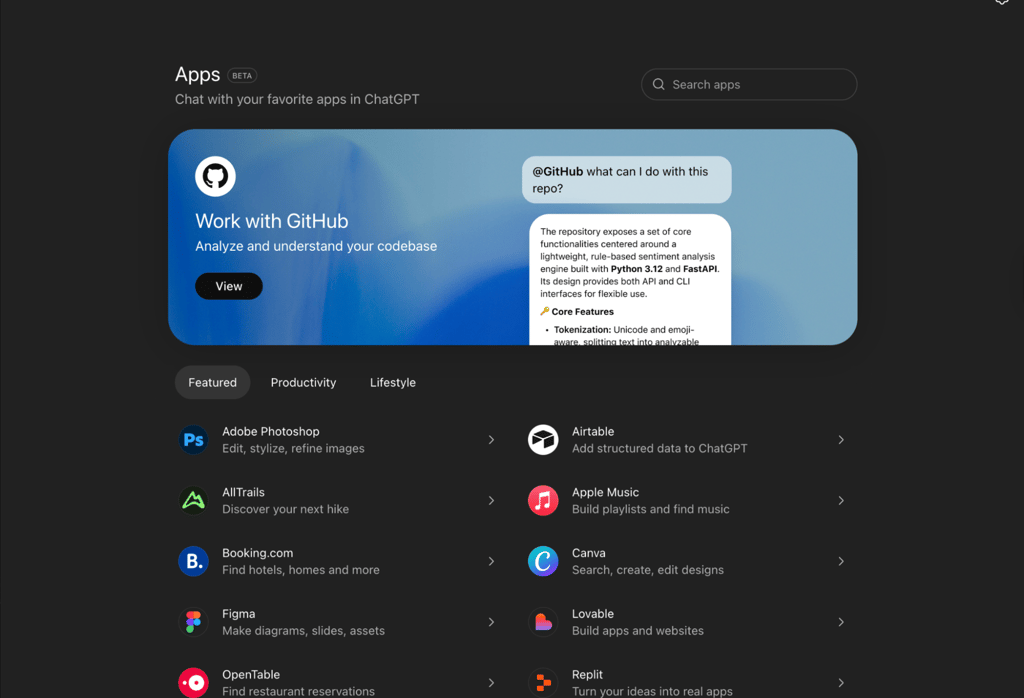
Search for Adobe Photoshop and select it
-
Choose Connect and confirm the integration in the pop-up window
-
Start a new chat or stay in your current chat and click the plus symbol, select More, and choose Adobe Photoshop from your enabled apps list
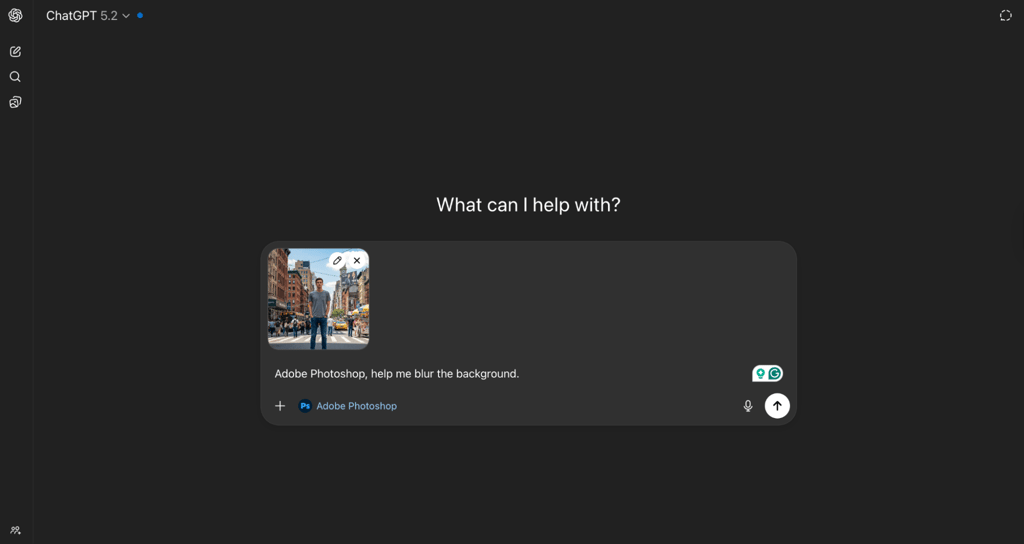
- Upload or drag and drop an image into the chatbox (on iOS, use Add photos & files)
-
Use a Photoshop command such as “Adobe Photoshop, help me blur the background” or “Adobe Photoshop, make the people pop in my vacation photo”
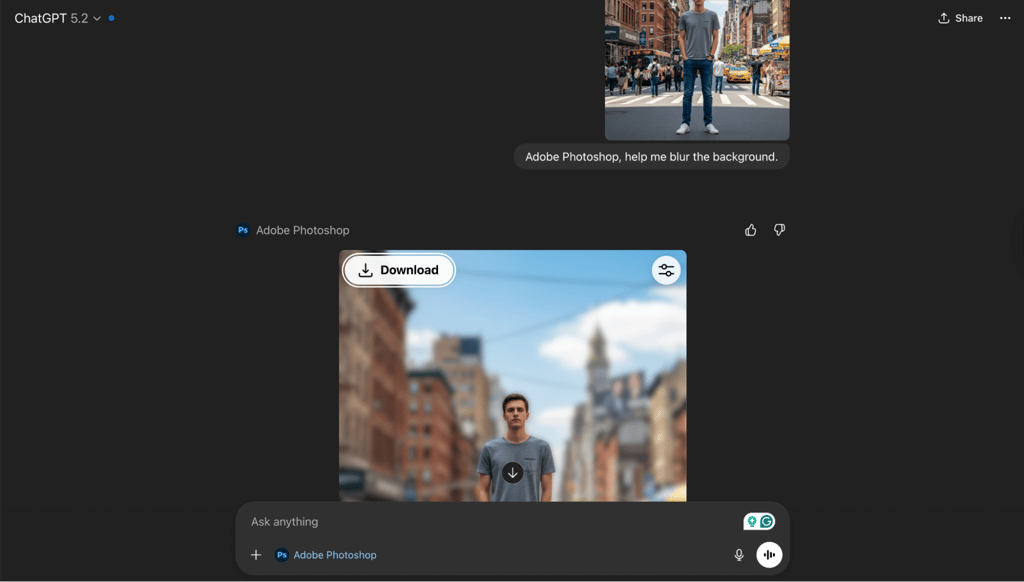
- Once it’s done, you can iterate in small steps, asking for an effect only on the sky or on the background, and then, if needed, apply a filter across the whole image
- When you see an adjustment slider, you can fine-tune it to your liking
Android support: Photoshop in ChatGPT rolled out for desktop/web and iOS first. At the moment, there’s no official release window for Android. However, third-party sources claim it’s coming soon.
To get the best results, you should be as descriptive as possible, as ChatGPT responds better to detailed instructions. Also, aim to explain what you don’t want in the image – not just what you want. You should also add helpful context if possible and try to split complex edits into separate prompts.
Key features of Photoshop inside ChatGPT
I, together with the Cybernews research team, thoroughly tested and evaluated Photoshop inside ChatGPT, including the key features essential for this integration. The integration has a few core capabilities, such as natural language photo editing, interactive controls, partial image editing, and a seamless hand-off to full Photoshop.
According to Adobe, the integration gives the 800 million people who use ChatGPT each week the “power and precision” of Photoshop with the “ease and accessibility of ChatGPT’s conversational interface.”
In my view, these features are why this tool competes with both template-type editors and AI photo apps. I appreciate that natural language takes a casual request and turns it into Photoshop adjustments, which is impressive on its own and practical.
Secondly, the interface hands over control to you after the prompt. You also get selective edits. And finally, I liked the addition of a file hand-off system to Photoshop on the web for more multi-layered work in the full program. It gives access to more effects, filters, and adjustments.
To me, this integration is basically a Photoshop assistant living inside ChatGPT, and in the next sections, I take a closer look at what it can do.
Natural language photo edits
In your ChatGPT window, and once you’ve activated the integration as explained in earlier sections, you can get started with editing your image. Adobe says it’s important to clearly describe what you want, such as making people stand out or changing things like vibrance, saturation, or exposure.
You can also adjust the background and contrast, as well as add effects. I’ve found common Photoshop effects such as Tritone, Halftone Color, Glitch, and Dither. You can also create selection masks to narrow down adjustments to certain areas, adjust shadows, and white balance.
When I asked ChatGPT about how many available effects it has, it listed over 15 separate effects. Some of the more interesting effects were: radial blur, tritone sepia, lens distortion, grain, and photocopy. You can also undo effects or clear all edits. Remember, the integration states you have a maximum of five effects per request.
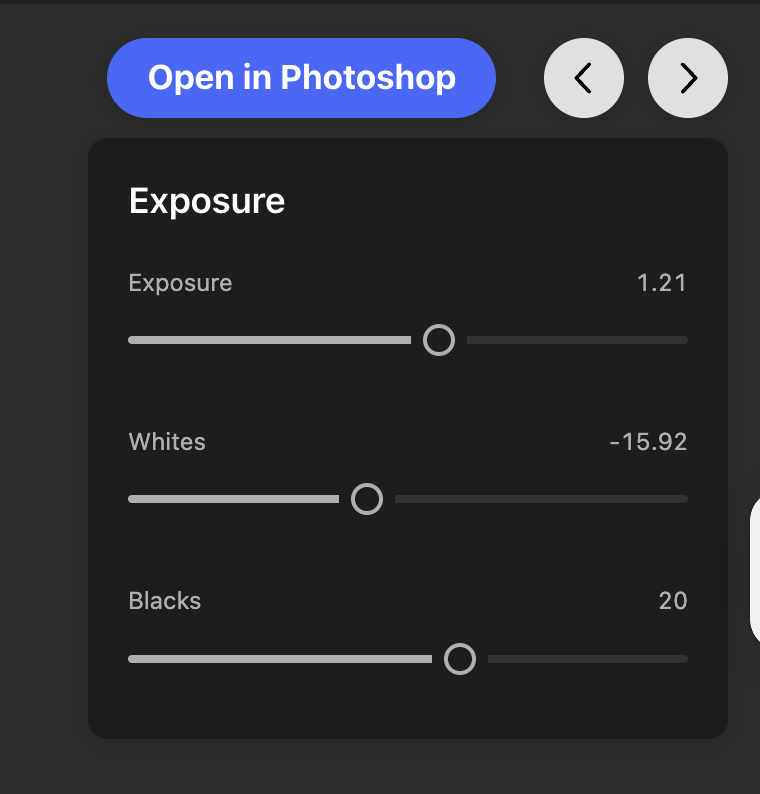
Interactive controls and sliders
After each edit, you can fine-tune your changes via UI sliders – without prior Photoshop knowledge. You should see a slider icon and a settings icon on the finished images that allow you to play with these adjustments. The sliders let you adjust settings like exposure, brightness, contrast, lighting, saturation, hue, and white balance. You should be able to apply these changes to the whole image or to a masked area.
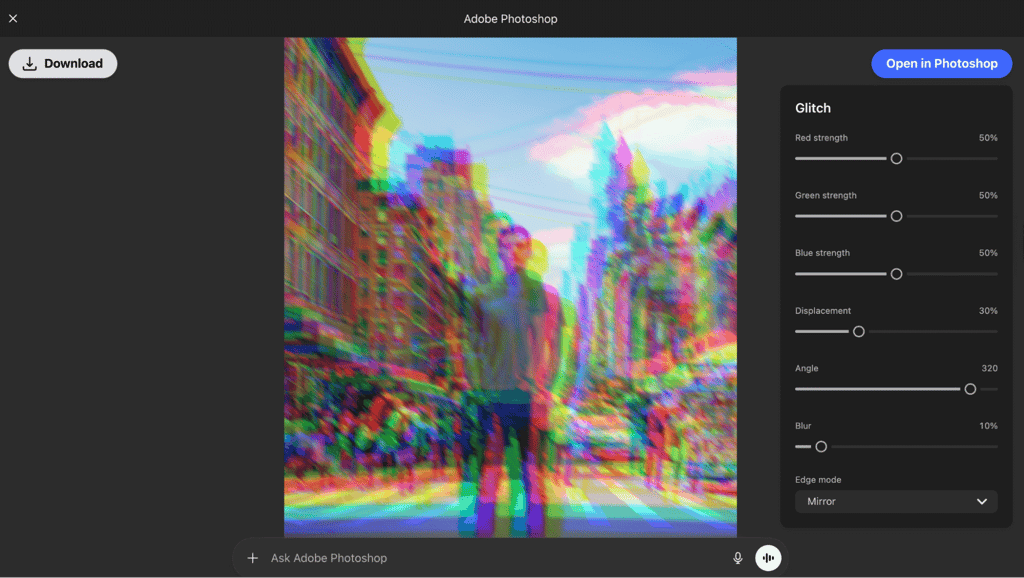
When you apply an effect – like bokeh blur, grain, or glitch – you should be able to adjust each one individually. Depending on the effect, you could adjust intensity, size/radius, direction/angle, or center point. In Adobe Learn’s walkthrough, Seán Duggan types “Enhance the color,” gets suggested adjustments, selects “Vibrance,” then drags a slider until the boost remains neutral. For shadows, he types “Lighten the shadow areas,” and increases shadows to brighten darker areas.
If Photoshop proposes multiple adjustments for a single prompt, you can preview them with the arrows. However, you can only apply the option you currently see.
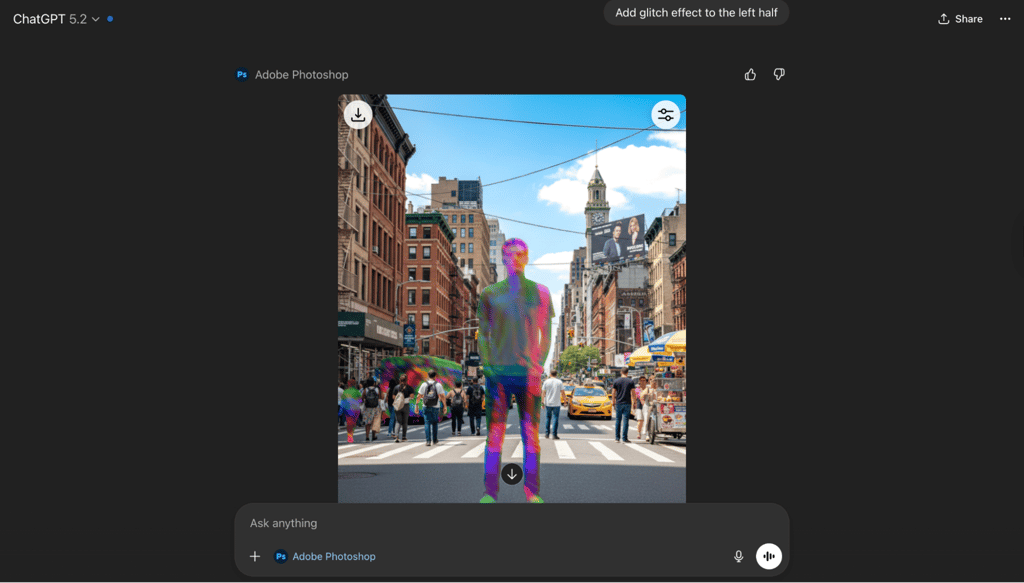
Partial image edits
The integration’s ability to make partial edits makes it feel closer to the full Photoshop. For example, you can target an effect or filter on one area only. You can also create a retro effect on just the sky and boost the exposure, or apply an effect to one person in the photo.
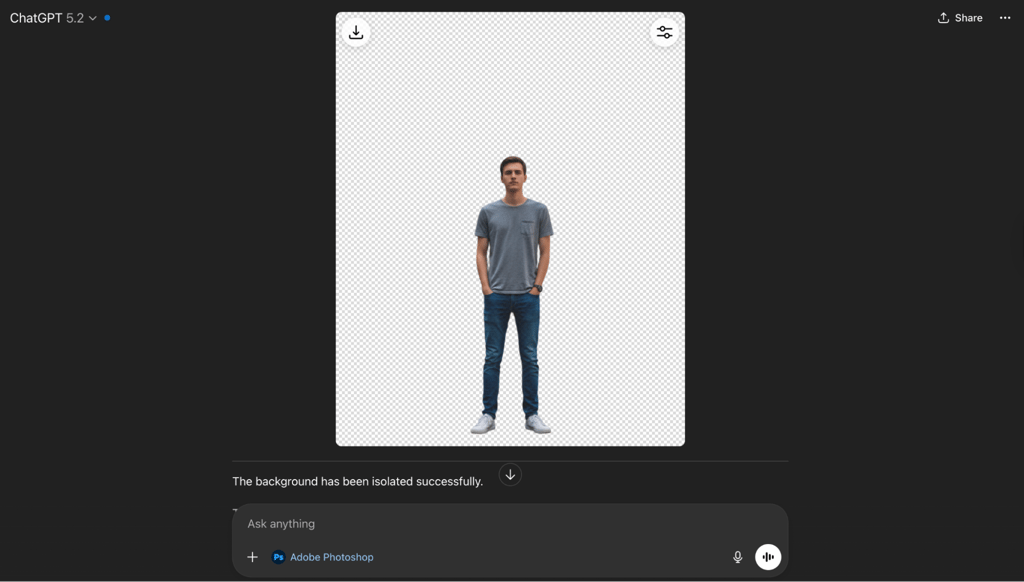
I was able to change the background color behind a subject, and apply a different hue and saturation to only it. The prompt template is simple: name the area, the adjustment, then add a constraint – such as “don’t apply to the face.” If the mask didn’t work, I explained the boundary again to ChatGPT and prompted it again.
It’s the same for effects. For example, I applied a color halftone to a tree in my image and added radial blur. I was also able to undo any of these changes easily, which I liked.
Seamless hand-off to full Photoshop
The hand-off feature is genuinely practical, making this integration more than an AI tool for photo editing. In practice, when you need more control, effects, or filters – or just more possibilities – you can click Open in Photoshop in the ChatGPT box to send my edited image to the full Photoshop on the web.
When you sent a file to Photoshop on the web, the edits made in ChatGPT appear as adjustment layers with a layer mask – just like in the full version of Photoshop. For example, the hue/saturation changes appear as editable adjustment layers with a mask, which is impressive.
Not only that, but effects carry over, too. Select the image layer, open Layer properties – again, just like in the full Photoshop – and you can adjust controls for a popular effect like radial blur. What’s also great about a hand-off system is collaboration – it means other people can finish and revise a file without redoing it from scratch.
Who should use this integration?
This integration should be used by people who want Photoshop-level edits without having to install/license the full, traditional Photoshop. If you’re already familiar with ChatGPT – such as if you use it daily for questions, research, or work – and you know your way around basic photo editing, then this integration should come naturally to you.
It also works for creators who want to quickly translate what’s on their mind into clean, usable images for scenarios such as social media posts, holiday cards, invitations, or personal projects.
I also think there’s value here for small marketing companies. For example, one team member can quickly create several variations in ChatGPT and then pass the file to someone else for another/final review. And when you need even more control, it’s very simple to send the file to Photoshop on the web.
What’s good is that this recent integration genuinely works in a wide variety of real-world scenarios. However, I wouldn’t recommend it as your only tool for high-level image work that requires layer management, advanced masking, compositing, or color grading. For jobs like that, the full Photoshop – and programs like Lightroom – have the horsepower and consistency to get serious work done properly.
How it compares to other AI editing tools
I’ve evaluated Photoshop in ChatGPT vs other methods and tools. Read below for their strengths, weaknesses, and typical use cases.
| Method/tool | Best for | Strengths | Trade-offs |
| Photoshop inside ChatGPT | Quick edits from prompts | Real Photoshop adjustments with in-chat controls, ability to export to Photoshop on the web | No generative edits in-chat, narrower toolset than full Photoshop |
| Traditional Photoshop (desktop/web) | Production work | Deep layers, masks, color management, Generative Fill can add/remove content | Learning curve, slower for simple tweaks |
| Adobe Firefly | Generative changes | Prompt to edit feature plus Generative Fill to add/remove/replace objects and backgrounds | Credit-based usage, less manual precision than Photoshop |
| Canva (Magic Studio) | Fast design output | Magic Edit/Eraser/Grab for simple changes inside a design tool | Less photo control, mainly for templates and social assets |
| Dedicated AI photo editors such as Luminar Neo or Topaz Photo AI | Photo enhancement | One-click AI enhancement plus denoise/sharpen/upscale pipelines | Less flexible for composites, tool-focused workflows |
Overall, Photoshop’s ChatGPT integration strikes a good balance – with fast, Adobe-backed edits that are exportable to Photoshop web. On top of that, you don’t need a paid version of ChatGPT to use it.
Final word
Whether the Adobe Photoshop in ChatGPT integration is worth it in 2026 depends on your workflow. It’s not a replacement for the fully-fledged desktop Photoshop, but it brings useful edits to your familiar AI chatbox. In my view, the hand-off to Photoshop on the web is what really makes it shine.
However, online users don’t seem to be very fond of the new update. Some like that free Adobe tools are being made available inside ChatGPT, but many want Adobe to fix performance issues in its complete programs first. Others mention slow processing, inconsistent masking, some policy blocks on benign edits, and prompts to upgrade for faster processing. Also, there’s no Android support yet – but it’s in the works. With all of that being said, I still highly recommend you give this new AI integration a go and see if it meets your needs.
FAQ
Is Photoshop inside ChatGPT really free?
Yes, Adobe officially states that its Photoshop, Acrobat, and Express suites are available to ChatGPT users, all for free. However, paid ChatGPT users note faster processing times.
Do I need an Adobe account to use the integration?
You may need a free Adobe account. In ChatGPT, go to Settings > Apps, pick the Adobe app, click connect, and you’ll see whether you need a free Adobe ID. You don’t need a Photoshop subscription to use the integration.
Can I export images at full resolution with Photoshop integration into ChatGPT?
This isn’t guaranteed in Adobe’s documentation. Adobe specifies that you can click the Download icon to download your edited photo, but doesn’t add specifics on resolution, dimensions, or export limits. It’s preferable to export your finished product to Photoshop on the web.