How to run your own AI Discord agent with OpenClaw (2026 guide)
Our in-house experts conduct independent, hands-on testing and transparent reviews of VPS hosting providers by using real server environments, and industry-recognized benchmarking methods to ensure impartial and evidence-based assessments
Using the same criteria for all VPS services, we share our detailed methodologies and testing practices to help customers compare performance, reliability, scalability, and overall value before choosing a virtual private server.
Learn more
OpenClaw has recently become a very popular personal AI agent, which has become an extension of LLM capabilities, using existing models ChatGPT, Claude, or Gemini to automate tasks. Rather than just a chatbot, OpenClaw works as an independent AI agent in the background, orchestrating and performing tasks based on your prompts.
OpenClaw can be integrated into multiple platforms, including Discord. This allows you and your friends to control the agents from your Discord server. In this step-by-step guide, I’ll show you how to install and run OpenClaw on Discord, giving you quick and simple access to the agent.
If you want your Discord bot to stay online and respond instantly, OpenClaw needs to run continuously — which requires a VPS instead of a local machine.

What is OpenClaw?
OpenClaw is an AI agent that can be installed on your local machine or a VPS and controlled via a variety of integrations, called channels. One such integration is Discord, which lets you use OpenClaw on your server.
OpenClaw’s capabilities are far broader than those of a chatbot like Google Gemini or ChatGPT, as it can orchestrate complex tasks and automate repetitive jobs, among other things. While OpenClaw itself is free, hosting and using AI API tokens may cost you depending on setup and task complexity. This, of course, comes with some drawbacks and security concerns that we explore in our OpenClaw review.
Why use OpenClaw for Discord?
OpenClaw can be integrated into Discord for multiple reasons, both as a communication interface and as a Discord-specific bot. In the first instance, you can integrate OpenClaw into Discord to control non-Discord tasks from anywhere. This is particularly useful if you’re using OpenClaw as a team assistant, letting multiple people prompt and control it. You can even set it up to be present in voice chat for continuous audio conversations.
The other option is using OpenClaw as a Discord-specific bot. Since OpenClaw can have admin permissions, you can set it up to moderate and control your Discord – letting it create channels, give users roles, and timeout or ban chatters.
What you need to run OpenClaw on Discord
To run OpenClaw on Discord, you will need a few tools to ensure that it runs smoothly.
- Discord application and bot tokens. You will have to create application and bot tokens in the Discord developer portal. This will allow you to add your custom OpenClaw bot to your server.
- Server. You will need a server for the bot to run from. You can set this up using a home server, but I would recommend using a VPS from a reliable provider like Hostinger instead. Hostinger offers dedicated OpenClaw hosting, including 1-click setup and dashboard-level management.
- Docker. To make OpenClaw installation and management easier, I recommend installing Docker on your server. Since Hostinger has an OpenClaw template on its VPS, Docker will be included in the 1-click install.
- LLM API key. For OpenClaw to work, it needs access to an AI model like GPT-5.3, Claude Opus 4.6, or Gemini 3.1. Note that all API access is paid, so customizing OpenClaw’s orchestration is crucial for reducing costs. If you’re using OpenClaw for low-priority tasks, you can also set up a local model like Llama on your computer.
- Domain. While not necessary, a domain is definitely helpful if you want to use OpenClaw through a web interface or a webhook.
Step-by-step: how to build an AI Discord bot with OpenClaw
Building a Discord bot with OpenClaw may seem like a daunting task. But by following this simple guide, you should be able to set it up quickly:
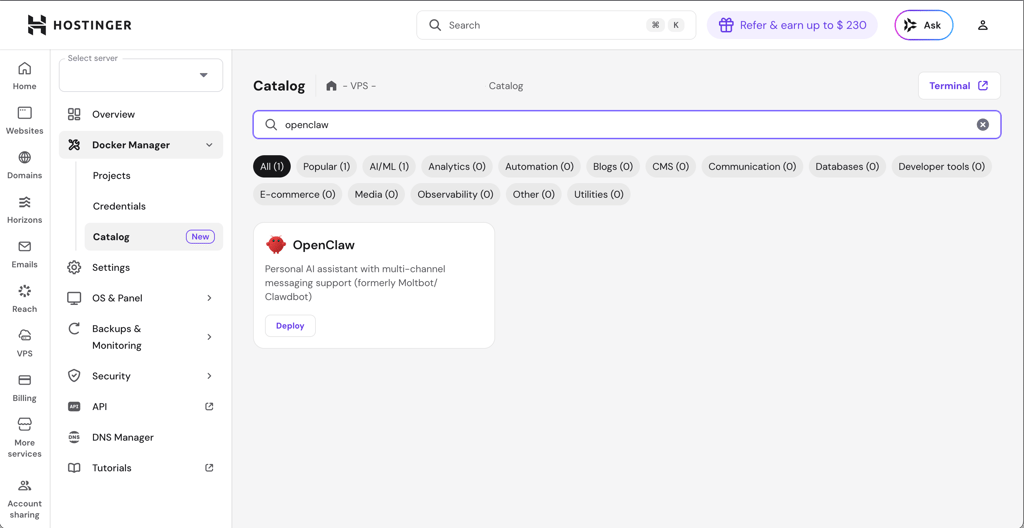
- Install OpenClaw. You can do this on your own computer or on a VPS server. I recommend using Hostinger, now 73% off.
- Create a Discord application and bot. Head to the Discord Developer portal and create a new application and bot.
- Set up the Discord bot’s privileges. Message content intent is required, server members’ intent is recommended, and presence intent is optional.
- Copy your bot token. Scroll down, click Reset Token, and save the resulting key.
- Invite your bot to your server. Use the OAUTH2 option to get an invite link. Copy it to your browser and follow the steps. Make sure to allow receiving DMs from server members.
- Configure your Discord bot with OpenClaw. Use commands in your OpenClaw command line to add your bot token to the configuration. Next, confirm the configuration by DMing the bot.
To help you set up OpenClaw on Discord, I also wrote a more detailed guide, showing you the exact steps you need to make to get OpenClaw working on your Discord server.
Step 1: install OpenClaw
In order to run OpenClaw, you will need to install OpenClaw on a server. You can do so on your own PC at home, but I would recommend using a VPS like Hostinger. In fact, Hostinger offers 1-click OpenClaw deployment. Otherwise, you will need to install Hostinger through a command or Docker, which I recommend. OpenClaw offers a simple installation guide that details multiple ways of deploying its software.
Step 2: create Discord application and bot
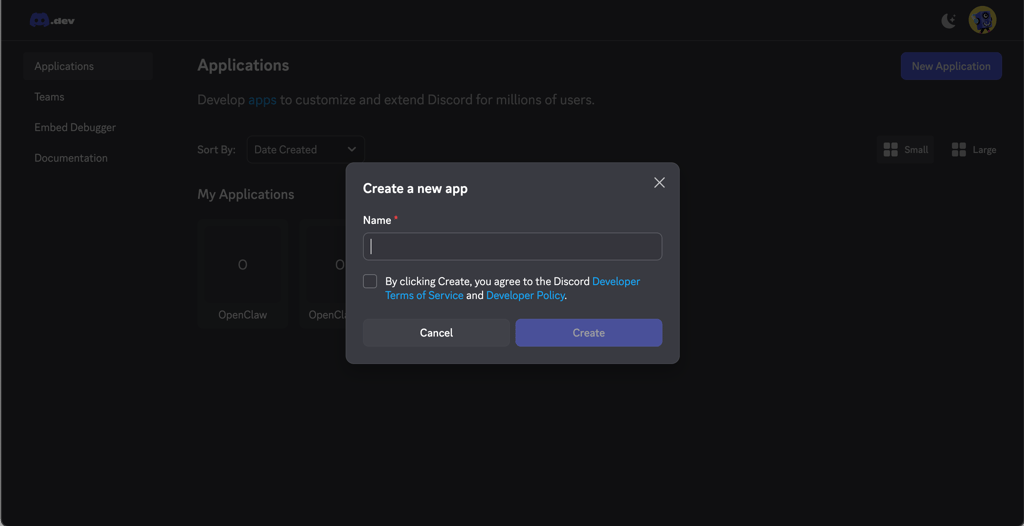
To install your own OpenClaw bot, you will need to create a Discord application and bot. To start off, you’ll need to create a new application. Click New Application in the top-right corner, and name it, e.g. “My first OpenClaw”.
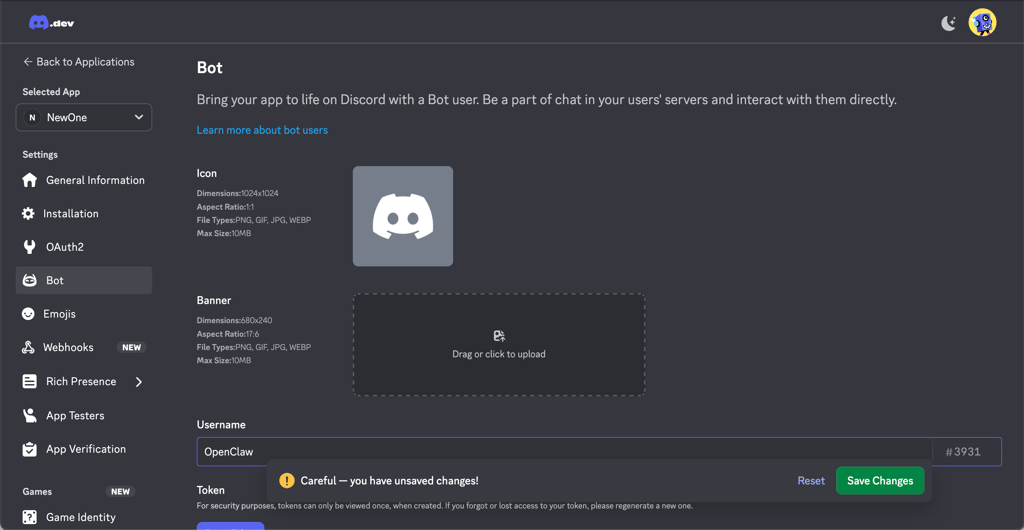
Once you have the app created, add a bot. You will need to pick a name for it, e.g. “Cybernews OpenClaw”, and you can also add an avatar to make it distinct.
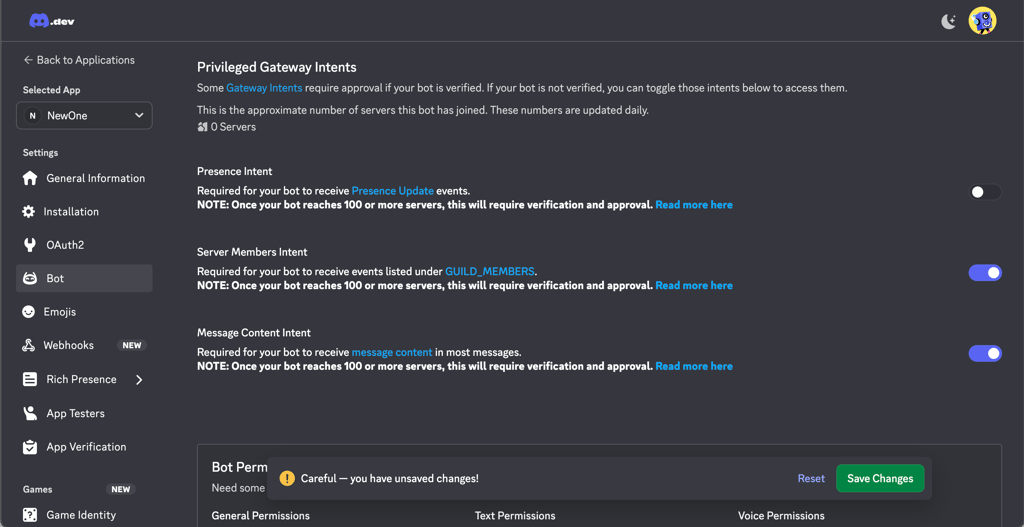
Step 3: set up the Discord bot’s privileges
In order to get your bot to work, you will need to give it specific permissions. Message content intent is required for the bot to work, server members intent is recommended as it will allow the bot to match server names with IDs, while presence intent is optional, and only needed for activity updates.
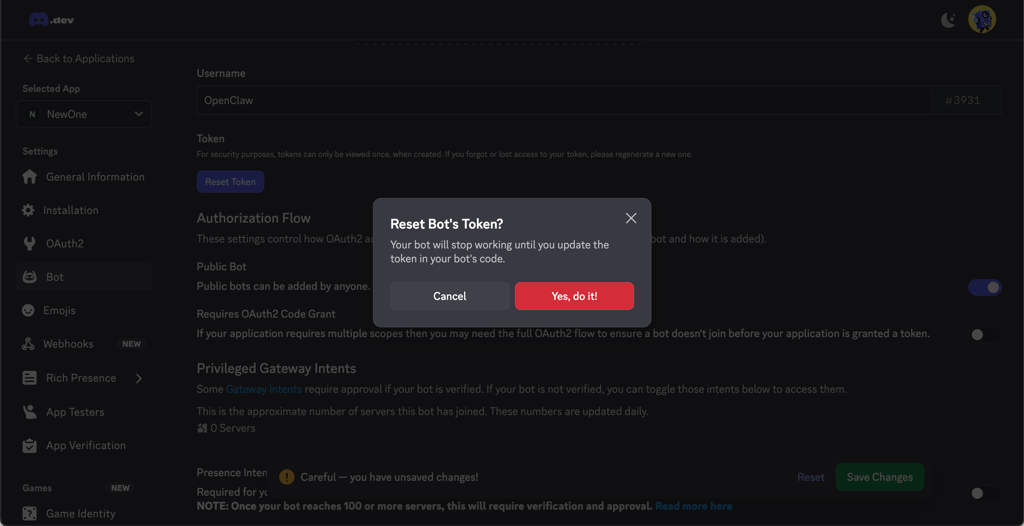
Step 4: create and save your bot token
You’ll next need to create an API token for the bot. To do so, scroll to the Reset Token option and click it. Note that this will not actually reset the token the first time, but create it instead. Once created, save the token as you’ll need it in the next steps.
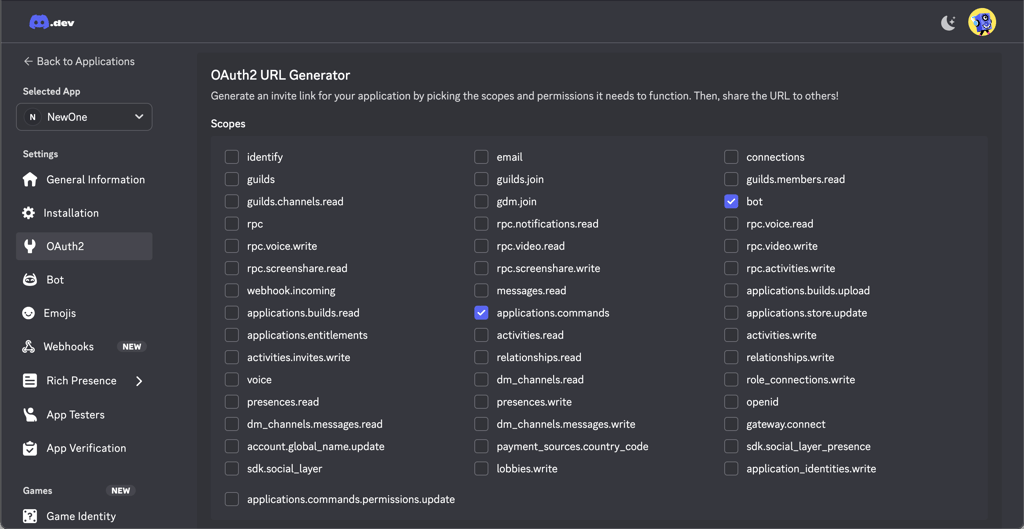
Step 5: generate an invite link
Now, you’ll need to generate an invite link to get the bot to join your server. To do so, click OAuth2 in the sidebar and select applications.commands and bot as your scopes.
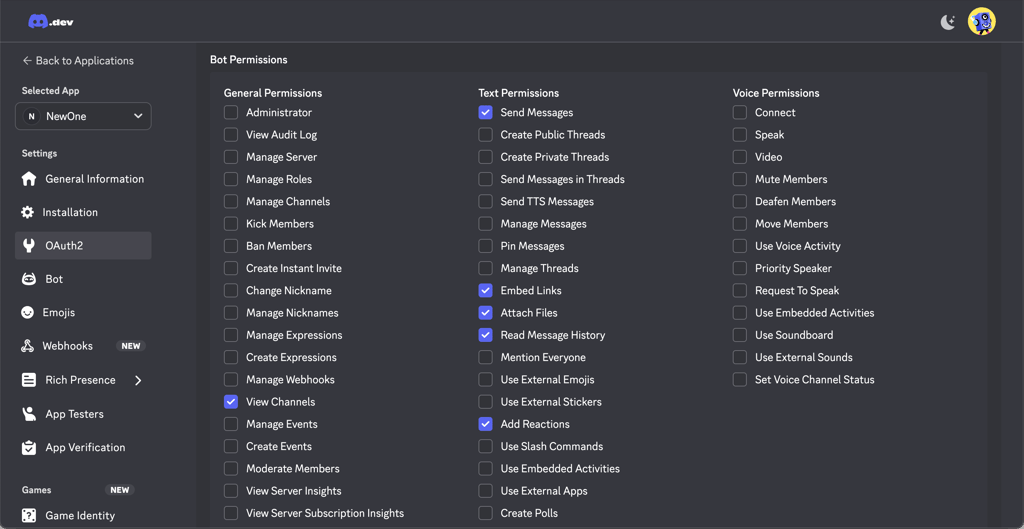
Next, select the following bot permissions:
- View Channels
- Send Messages
- Read Message History
- Embed Links
- Attach Files
- Add Reactions (optional)
Scroll down and copy the generated URL.Discord bot OAuth2 URL window
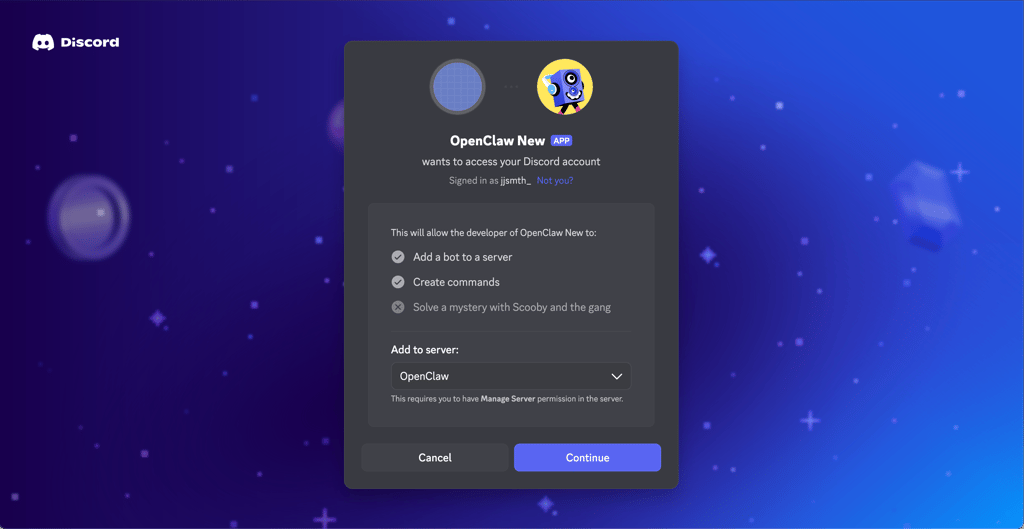
Finally, authorize the bot to access your account and pick a server in the browser window.
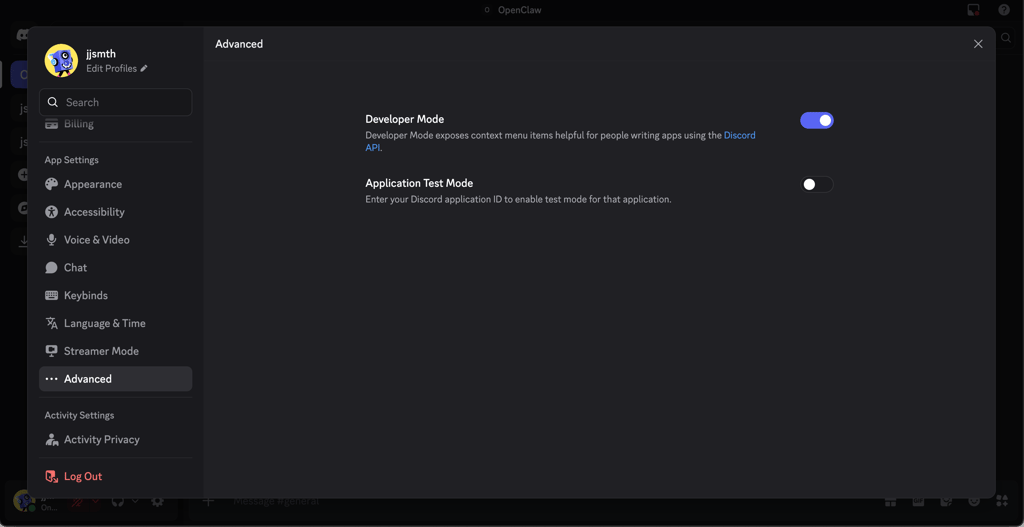
Step 6: configure your Discord bot with OpenClaw
You will have to configure your Discord bot with OpenClaw. First, head to Discord’s advanced settings and enable Developer Mode.
Next, right-click your server icon and copy and save the Server ID in a note-taking app. Afterwards, right-click your avatar and do the same with the User ID. They will come in handy later.
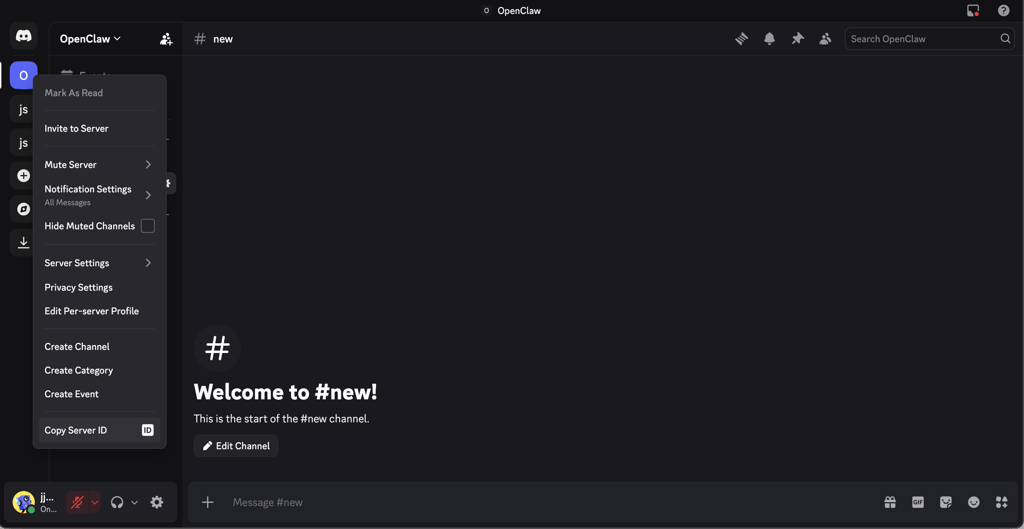
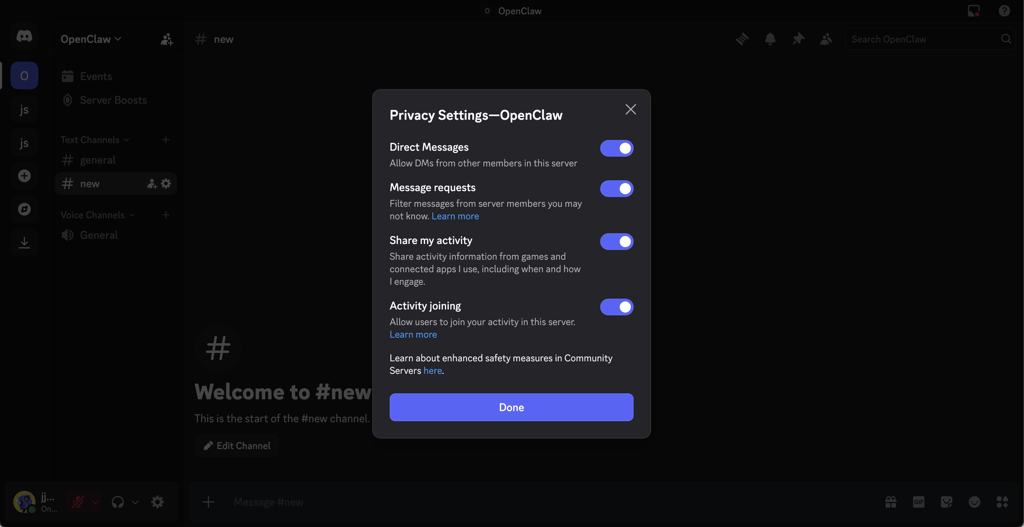
Once that’s done, right-click your server icon again and head to Privacy Settings. There, enable Direct Messages. This will let OpenClaw communicate with you via DMs.
Once all of that’s done, go to your OpenClaw settings and paste the Discord Bot token in the Channels menu.
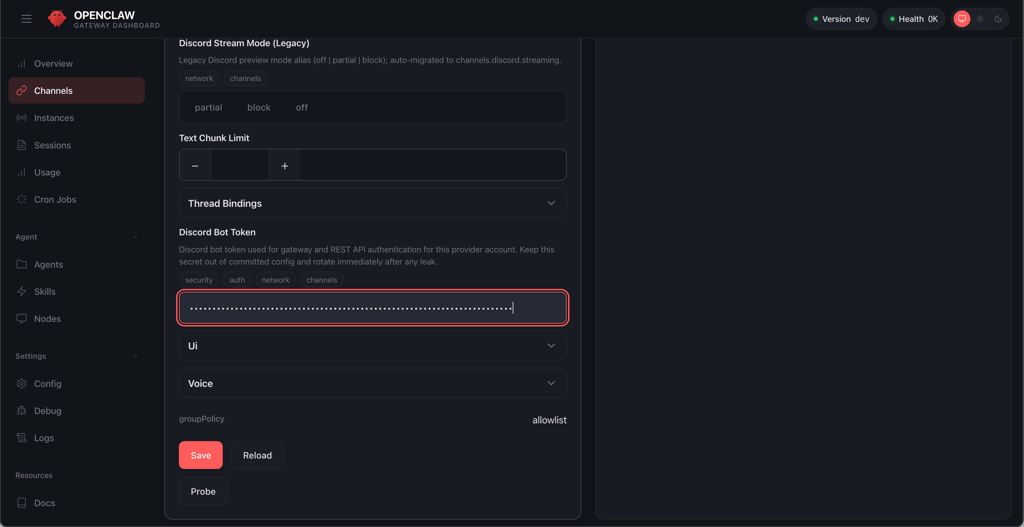
You can also do this via a command:
openclaw config set channels.discord.token '"YOUR_BOT_TOKEN"' --json

openclaw config set channels.discord.enabled true --json

openclaw gateway
Or, if you’re using Hostinger, you can do this via the Hostinger API environment settings by manually typing in DISCORD_BOT_TOKEN and pasting the key.

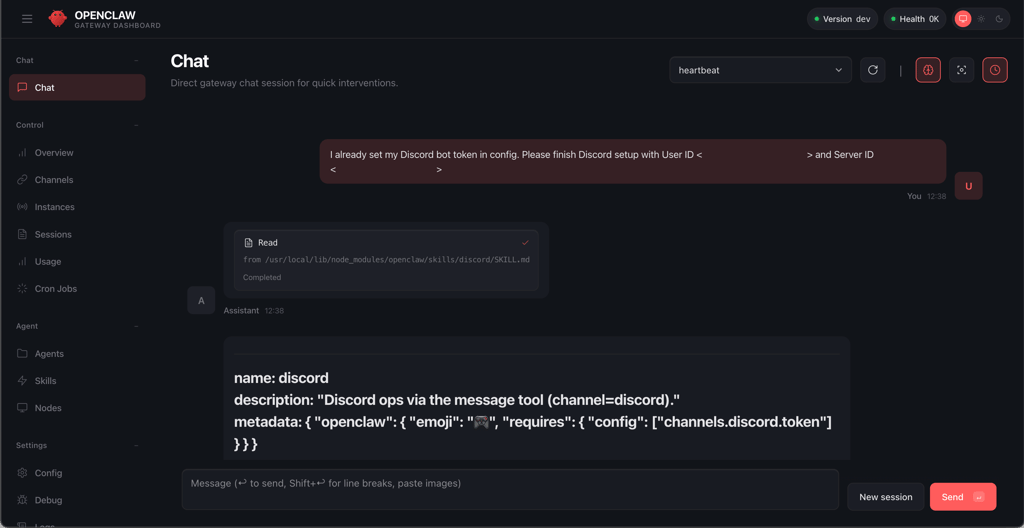
Finally, you can launch your Discord bot by prompting OpenClaw through an existing channel, like its dashboard or Telegram, with the following command:
I already set my Discord bot token in config. Please finish Discord setup with <User ID> and <Server ID>.
Note: Replace the placeholders with the previously saved IDs.
Once that happens, DM your bot in Discord. It may respond with a pairing code that you should relay to your OpenClaw chat by typing in:
Approve this Discord pairing code: <CODE>
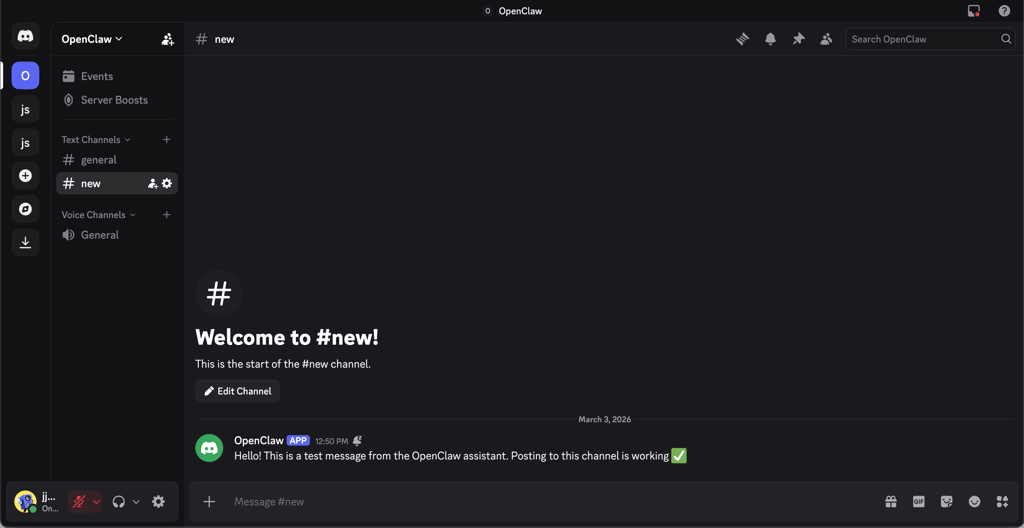
Step 7: use your bot
Congratulations, you can now use your OpenClaw bot as an interface for the OpenClaw agent. To do so, simply talk to it as you would with a chatbot like ChatGPT, Claude, or Gemini. If you need help, the bot should also be able to troubleshoot your issues.
Final thoughts
OpenClaw is an interesting tool for people who want to see what an independent AI agent can do for their productivity. That’s why you should also be sure to learn how to use OpenClaw securely before you give it access to sensitive information like your inbox or root access to your computer.
However, if configured correctly, OpenClaw can be a powerful tool in your arsenal. With it installed, you get a full-on AI assistant capable of more than just answering questions, instead executing your commands and maintaining functionalities. Using OpenClaw on Discord can be useful for teams looking to oversee their bot's functionality and for Discord users who want an ultra-smart moderation tool to help them manage their community. By applying this step-by-step guide, you should be able to start the process of creating the perfect Discord AI assistant for your needs.
FAQ
What is Discord Openclaw?
OpenClaw is an open-source, customizable AI assistant you can integrate into Discord as a bot. It connects to language models (like GPT-5.3 or a local LLM like Llama) to automate tasks, research, and interactively chat.
Can I self-host an AI Discord bot?
Yes, you can self-host an AI Discord bot like OpenClaw. For reliable 24/7 uptime and security, I highly recommend using Hostinger VPS to keep your AI assistant running without exposing your local machine.