How to build a website on Bluehost
Our team of experts and researchers rigorously test and evaluate website builders through transparent, in-depth testing procedures and methods using both in-house and industry-approved tools.
Drawing on cybersecurity insights, we provide unbiased, empirical rankings and analysis to help users make informed digital platform choices.
Learn more
If you want to build a website quickly and effortlessly, Bluehost’s Website Builder is a great option. Designed for beginners, it features a user-friendly drag-and-drop interface that simplifies the process of creating a professional website. Whether you’re launching a blog, portfolio, or online store, Bluehost offers a variety of templates and customization options to match your vision.
In this guide, I’ll take you through the step-by-step process of creating a website with Bluehost’s builder in just 6 easy steps. By the end, you’ll have a fully functional site that’s ready to go live.
How to build a website with Bluehost

- Go to the Bluehost website and choose a plan – Choice Plus is great for beginners
- Add the site to your hosting plan
- Set up WordPress
- Choose a template that matches the style you want
- Use the Bluehost WonderSuite web builder for WordPress to start customizing the site
- Preview, test, and publish your site
Our in-house research team and expert writers work hand in hand to regularly test website builders and provide accurate and fact-checked information. Discover the ins and outs of how we test and evaluate website builders.
Guide on building a website with WordPress on Bluehost
Building a blog website with WordPress on Bluehost is easy, even if you’re a beginner. With Bluehost, you get a simple setup process, free domain, and access to WordPress’s many features. Here’s a step-by-step guide on how to create your website:
- Choose a domain name and install WordPress
- Set up your website
- Choose key features
- Customize your website
- Explore and add plugins
- Create a privacy policy
Step 1: choose a domain name and install WordPress
When you sign up for Bluehost and set up your account, the website builder allows you to import an existing website or create a brand-new one.
If you want to start from scratch, log into your Bluehost account, head to the Websites section, and click ADD SITE. This is where you can start building your website.
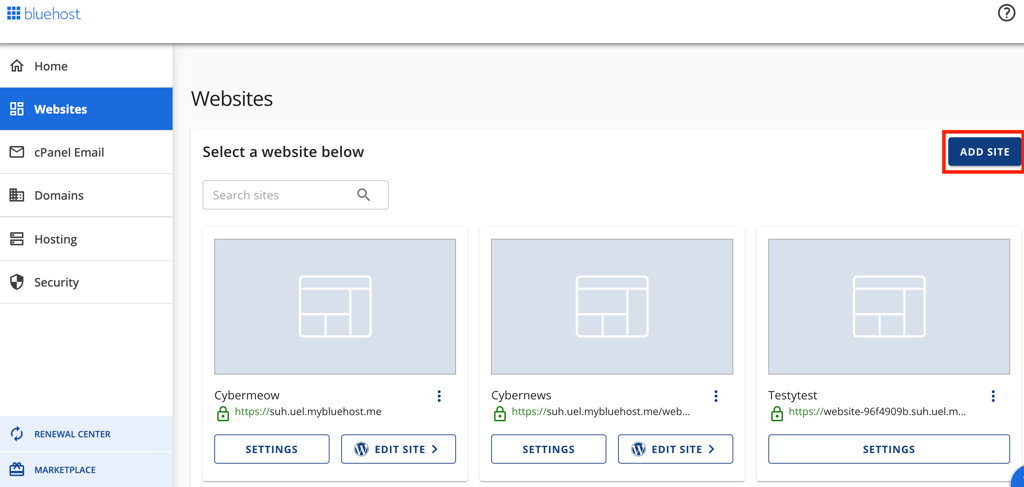
In this guide, I’m focusing solely on the Bluehost Website Builder, so I created a new site. It took a few seconds to load, so a bit of patience might be needed.
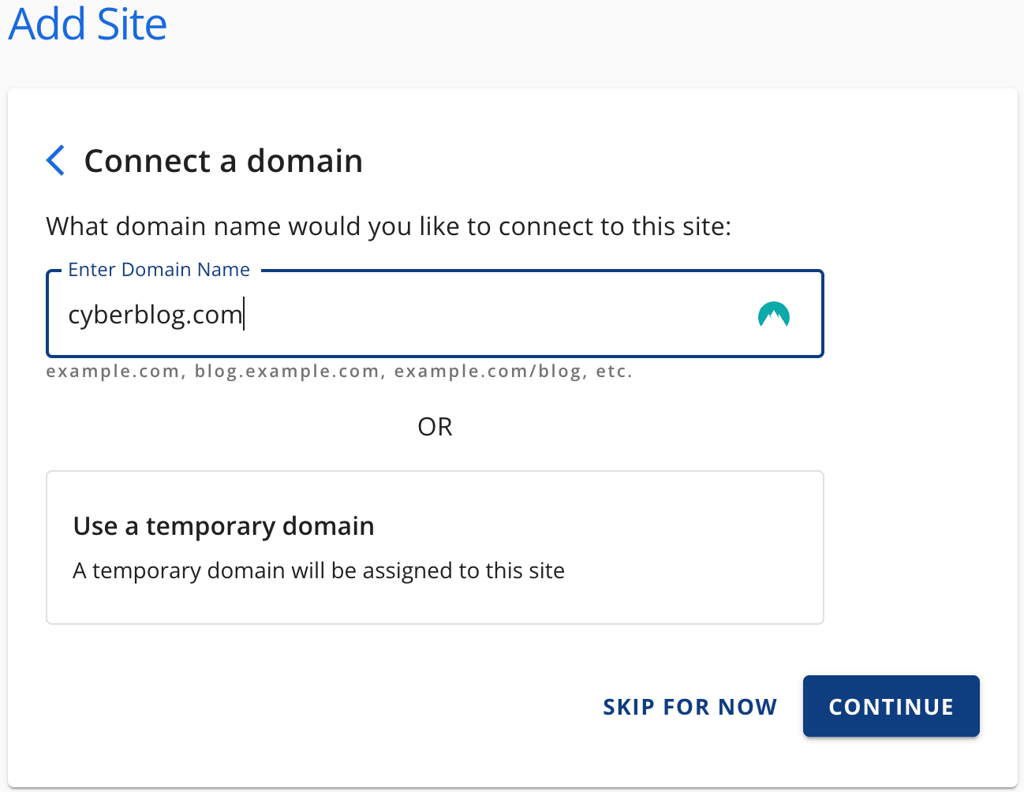
Here, you can choose to install WordPress or transfer an existing WordPress. I decided to install WordPress.
Bluehost, like other providers such as GoDaddy, includes a free domain for the first year with their hosting plans. This can be a cost-effective way to get your website started. Check out our full Bluehost hosting review to learn more about this host.
Step 2: create a website
After creating a domain name and waiting a few seconds, I was transferred to the website-building setup.
Bluehost allows you to use AI assistance, but I wanted to build my website step by step, so I went through the guided setup.
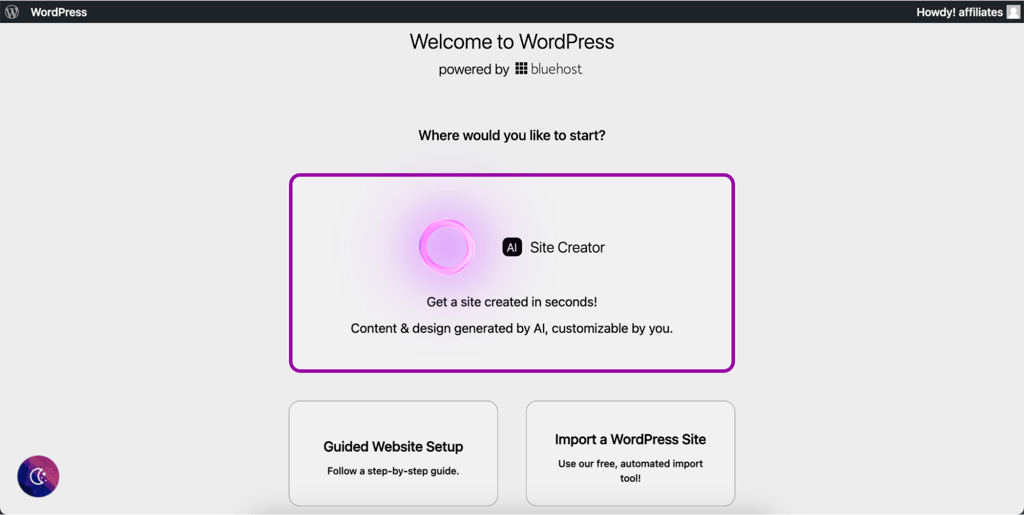
I clicked the start setup button to begin the process. First, it asked a few questions about my experience level with WordPress. Then, it prompted me to select the type of website I wanted to create.
Tip: If you’re not sure about your site's purpose yet, select Business as the website type. This selection unlocks more themes and tools that you can narrow down later as your site evolves.
The setup was fairly simple, though it felt a bit longer than expected.
Some providers, like Wix, take you directly into the editor, which makes the process feel faster and more intuitive. With Bluehost, there are a few additional steps that may make it feel a bit slower in comparison. For example, after setting up your account, Bluehost asks about your WordPress experience level to customize the setup. You're also asked to select the type of website you're creating, such as a blog, business site, or portfolio.
While these extra steps might seem slower, they help customize the setup process to your specific needs, something not all platforms offer. This tailored approach ensures you get the right tools and guidance based on your experience and website goals.
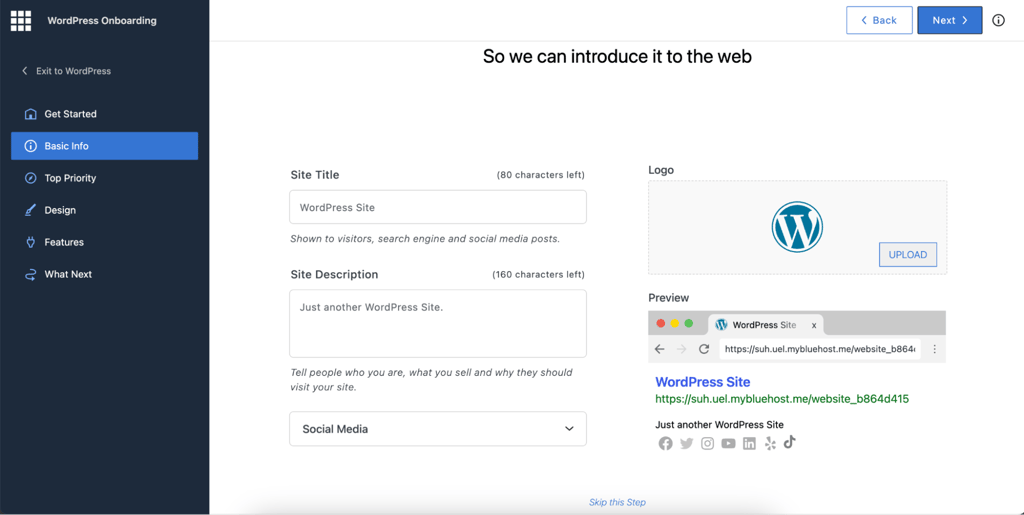
I chose to continue with the design process. Bluehost allows you to select a theme seemingly based on your preferred color palette. From there, I could customize specific design details, such as headers and layout.

One downside I noticed was that it took a couple of seconds to load every time I clicked the Next button to move forward. The delay made the process feel less smooth and a bit more time-consuming than I would have liked.
Step 3: choose key features
Next, I was prompted to select the key features I wanted to include on my website. This section, labeled Key features, presented a variety of WordPress plugins and services to choose from, offering a toolbox of options to improve functionality.
When exploring the plugins offered by Bluehost, you’re recommended a bundle of plugins during the setup. However, I recommend double-checking to see if you actually need each of these plugins. Hosting providers sometimes form partnerships with certain plugins and include them by default, which means you might end up with tools that don't necessarily fit your website's needs.
In my case, though, I found Bluehost's suggestions to be quite suitable. The bundle included Yoast SEO for search engine optimization, Jetpack for security and site management, and OptinMonster for creating high-converting opt-in forms. After reviewing each of them, I decided to keep them all.

After making my selections, it took about a minute to finalize everything, and then I was welcomed to my newly created blog site.
Step 4: edit the website
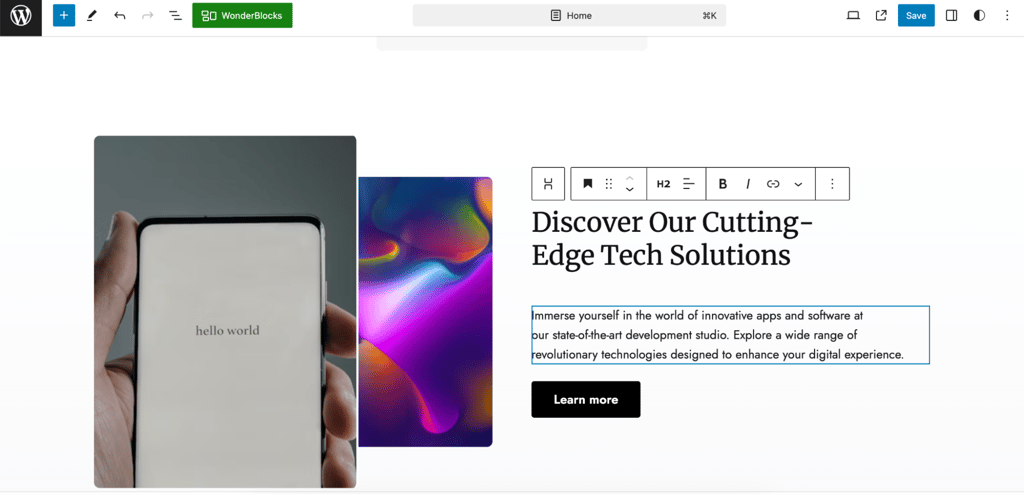
Once the website template pages and plugins were set up, I moved on to editing the elements using Bluehost's WonderSuite builder. While it's not exactly a traditional drag-and-drop editor, it still allows for a straightforward customization experience. You can easily modify different elements like header text, logos, and images.
With WonderSuite, you can slide elements into place using the available buttons for adjustments, rather than dragging them freely around the page. This setup gives you the flexibility to change text, update branding, and add pictures, all within a structured layout. It may not offer complete freedom in placement, but it does provide full control to customize the site according to your needs.
Here’s how you can go through the process:
-
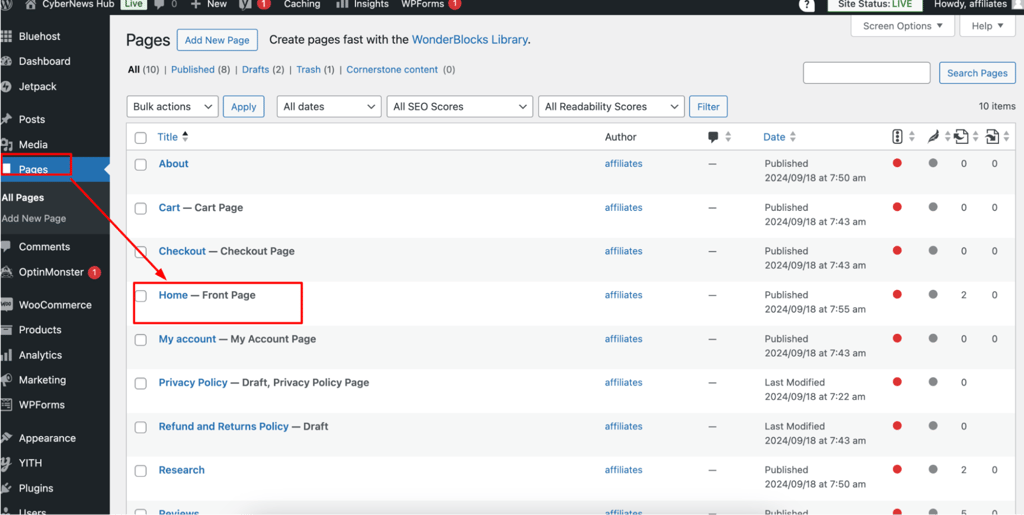
Access and edit your pages. To start customizing your website with Bluehost's WonderSuite builder, your first step is to navigate to the Pages section. Here, you'll find a list of pages that were automatically added based on the template you selected during the setup process.

Bluehost home page -
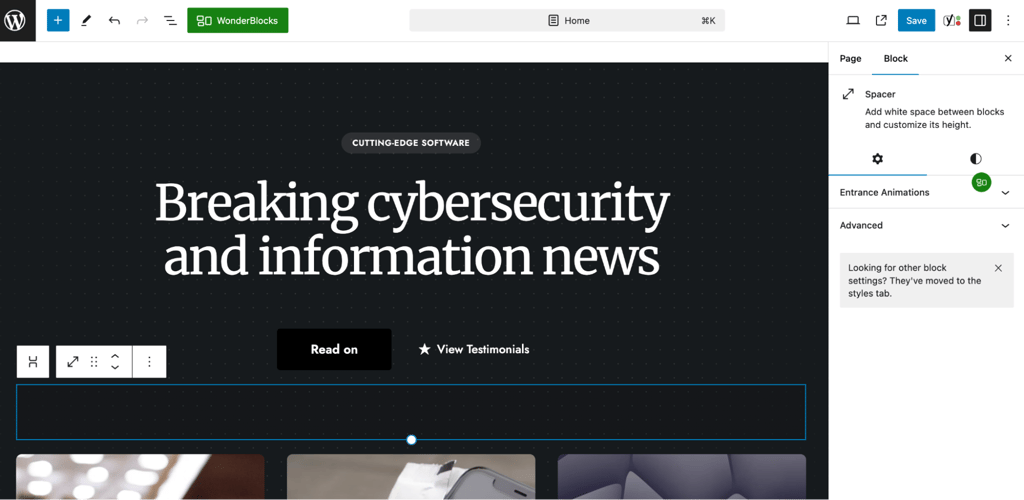
Improve your pages using WonderBlocks. While editing a page, you can access the WonderBlocks section, which offers various patterns and elements to fit your website’s needs. For instance, you can add forms, call-to-action sections, FAQ blocks, or image galleries. Simply browse through the available options and insert the elements you need. Each block can be customized to align with your brand’s style and layout. This feature allows you to build functional and visually appealing pages without starting from scratch.

Bluehost wonderblocks - Choose your featured cover image. You can either upload your own image or select one from Bluehost’s collection of free stock photos. If you need more options, there are many free stock photo sources available online.
- Add your logo. Personalize your site by adding a logo. If you don’t have one yet, you can use a free logo maker, like the Themeisle Logo Maker, or hire a professional designer. This step really helps give your website a branded look.
-
Pick font pairs. Bluehost’s Website Builder provides pre-selected font pairs that work well together. I simply browsed through and picked the pair that best matched my site’s style.

Bluehost edit your page - Choose site colors. Choose a color palette to match your brand. Bluehost suggests unified color schemes, making it easy to select colors that look good together and give a consistent feel to the site.
- Select your navigation style. Set up the top navigation menu for your website. This is how visitors will move around your site, so picking a style that’s both user-friendly and visually appealing is key.
- Add contact info. Finally, add your contact details to the footer. This is an essential feature, especially if you want visitors to easily reach out.

Tip: On the left side of the editing panel, there’s a Document Outline feature. This is a handy tool, especially if you want to jump between sections without having to scroll through the entire page each time. It makes navigation and editing much more efficient.

After spending some time playing with the colors and text fonts, I finally got my blog site looking just the way I wanted. Satisfied with the design, I saved all my changes and continued to the home front.
Step 5: add plugins
Next, I explored the plugins that come with Bluehost. I found that Bluehost includes several essential plugins pre-installed, making it easier to get started without having to search for them manually. For example, Yoast SEO is included and is incredibly useful for optimizing your website’s content and improving your search engine ranking. It helps you choose the right keywords, craft meta titles, and optimize meta descriptions, guiding you through SEO best practices.
Other pre-installed plugins include Google Analytics for tracking your site’s performance, Jetpack for security and overall site management, and OptinMonster for creating high-converting opt-in forms to grow your email list.
However, if you find that you need additional functionality, Bluehost allows you to easily install new plugins, such as WooCommerce for building an online store or bbPress for adding forums to your site. There’s a plugin for just about every need, so if you feel something is missing, chances are, there’s a tool that can help.

Extra step: create a privacy policy
When I built my website with Bluehost, I quickly realized that having a privacy policy wasn’t just a formality but a necessity. My website collects information like email addresses for newsletters and uses cookies for analytics, which meant I needed to be transparent about how I handle visitor data.
More importantly, certain laws, like the General Data Protection Regulation (GDPR) in Europe, have strict guidelines that websites need to follow. Using a generic privacy policy template just wouldn’t cut it. I needed to customize it to reflect how my site actually operates.
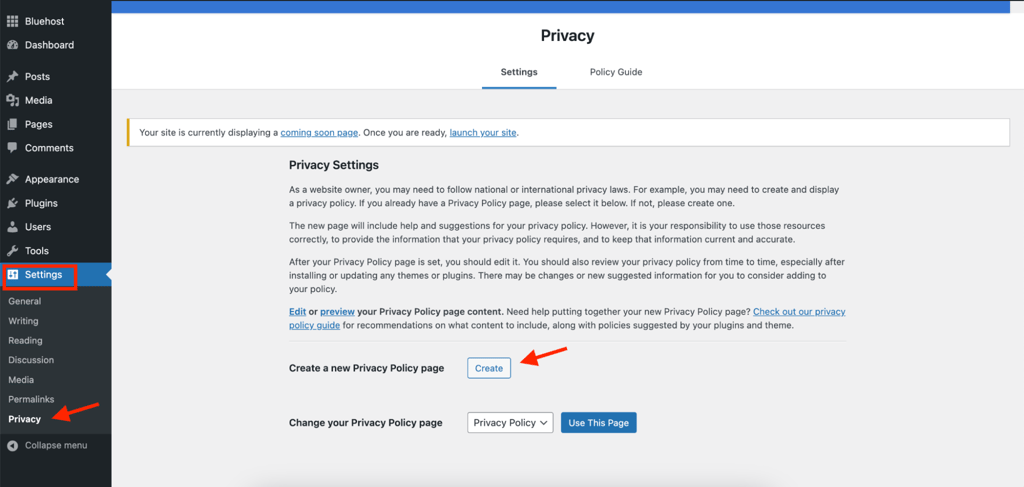
Thankfully, Bluehost makes it pretty easy to create and edit a privacy policy directly from the WordPress dashboard. I simply logged into my Bluehost WordPress dashboard and navigated to Settings, then Privacy. On the page, you will find a possibility to create a new page just for the Privacy Policy.
Why editing your own privacy policy is essential
A basic privacy policy might touch on general data practices, but it won’t address the specific ways your website collects, uses, and stores data. For example, if you’re using plugins for analytics, email marketing, or an online shop, you have to disclose these practices.
Bluehost doesn’t come with a built-in privacy policy generator, so I turned to TermsFeed for a basic template. From there, I customized it to fit the unique aspects of my website:
- Cookie usage. I described how my site uses cookies for analytics and user experience improvements.
- Data collection. I detailed what kind of data I collect, like email addresses for newsletters and comments, and explained why I collect it.
- Data storage and security. I specified how long data would be stored and the measures I’ve put in place to secure it.
- Third-party services. Since I use plugins like Google Analytics and OptinMonster, I included information about how these services process user data.
After creating the privacy policy, I added a link to it in my website’s footer. This small addition not only made the policy accessible to visitors but also seemed to help with SEO.
Final thoughts
By following these simple steps, you can have a fully functional, professional-looking blog up and running on Bluehost. The process is a bit more detailed when compared to other top web builders, but the extra steps allow you to tailor the site to your needs and skill level. Plus, with pre-installed tools like Yoast SEO, Google Analytics, and a variety of plugins, Bluehost makes managing and upgrading your website a smooth experience.
FAQ
Is Bluehost good for WordPress?
Yes, Bluehost is a great WordPress option. It offers a one-click WordPress installation, making it easy to set up. Plus, WordPress.org officially recommends it due to its performance and support.
How many websites can I build with Bluehost?
Bluehost allows building from 10 to 100 websites. The number depends on the plan you choose. The Basic plan allows you to build 10 websites, while the Plus, Choice Plus, and Pro plans let you build 50 to 100 websites.
Is WordPress free through Bluehost?
Yes, WordPress itself is free to use with any Bluehost plan. However, you’ll need to pay for the hosting plan you choose, and there might be extra costs if you want premium themes or plugins.